Roden 1/72nd
Felixstowe
F.2A (Late)
By
Dennis
Ugulano
|  |
Introduction
The Felixstowe,
in my opinion, is RODEN's most ambitious WW1 project to date. With
over 200 hundred parts, it should satisfy anyone's need to super
detail a kit. There have been many reviews of the kit, so I will
not go there.
The instruction
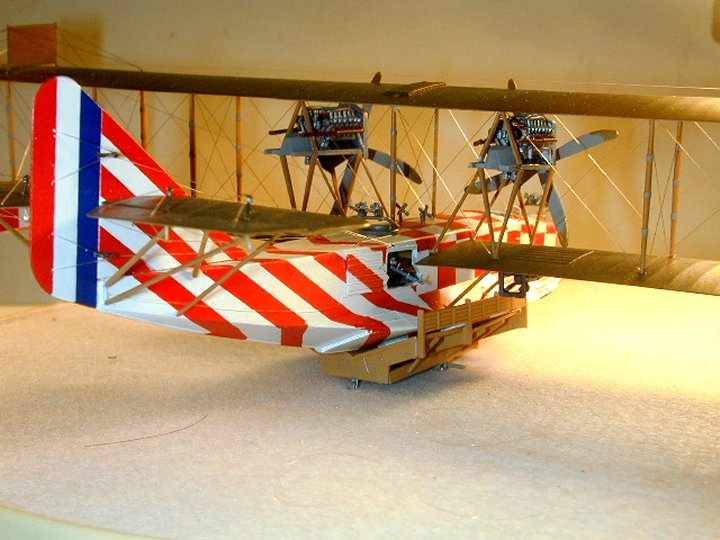
sheet is 12 pages and is very clear and easy to follow. It shows a
complete rigging diagram and four color schemes so one could go
from easy to insane according to one's level of masochism. The
plane can be built without any outside reference showing how
detailed the instructions are. With that out of the way, let's
start the build.
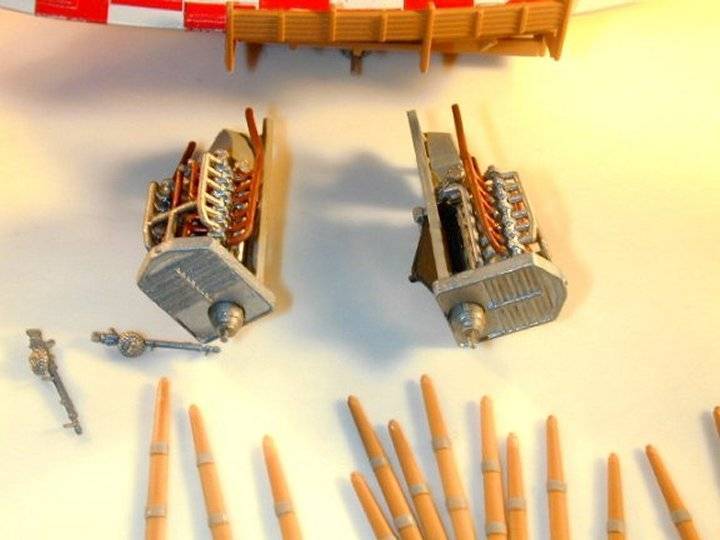
Engines
Each
engine has 34 parts and that's 20 too many. Most of the parts do
not fit and are oversized. Build each engine exactly as shown in
exactly the steps shown or parts will not fit down the road.
Almost all of the parts must be trimmed down in size so that they
will come close to fitting during assembly. Constant alignment is
required and even then you are not assured of a good fit. After
too many attempts and much too long in time, I finally completed
the engines so that they looked ok. I will not use the word good
because I don't think they are.
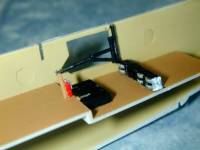
Fuselage
The fit here is
very good. The parts are clearly marked and fit exactly where they
are supposed to. The only minor problem is the extra magazine
boxes that fit on the floor at the waist/top gunner position. They
are a little to wide and must be trimmed just a touch so they fit
across the fuselage.
The hull went
together well but make sure the fit is good on the bottom as a
very delicate fin runs the length of the fuselage and it would be
very easy to sand it off and very difficult to put it back. A
little sanding was necessary to get the floor to fit but nothing
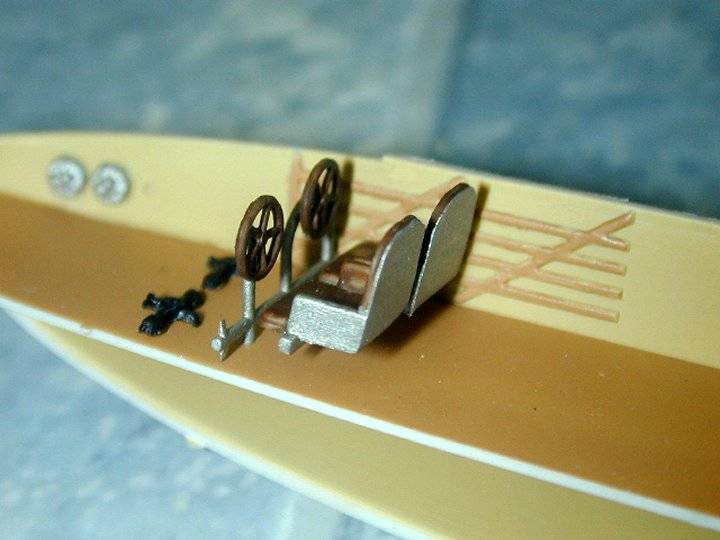
that will cause any problems. I added the waist machine gun
supports at this time but in the inward folded position. I wanted
to open the doors for the guns but had to wait until after the
painting and decaling was complete.
At
this point you have a decision to make. The fuselage top requires
some sanding especially in the rear portion. The fuselage has two
slots the the lower wing slides into and then the top of the
fuselage piece is added. I chose a very complex color scheme and
did not see how I could paint the model with the lower wing
(actually the entire wing assembly) in the way. I chose to add
spars across the fuselage so that I could slide the lower wing
into to position and still have some support. After the spars were
dried, I added the top of the fuselage and did my sanding until it
was free of any cracks.
|
 |
|
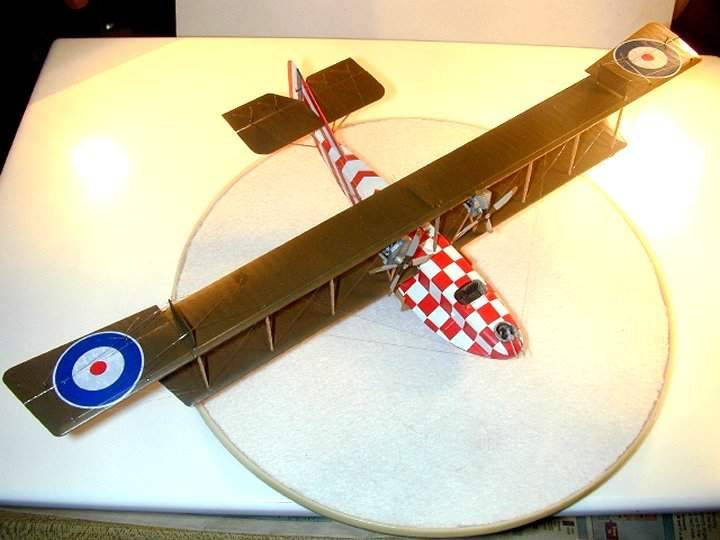
Since I had
decided on my method of construction I took the fuselage half to a
copy machine and made a copy of the fuselage in full size. On this
sheet I got my angles for my color scheme and the size of the
squares. This was done mainly by eye. After the fuselage was
painted white and dry, I spray painted some clear decal sheet the
color I wanted
and then cut out each square and strip one at a time. With the
squares, I started just behind the forward machine gun and went
backwards and down from there. In some areas I had to fake it a
bit but a little red paint hid most of the flaws. The strips were
made to match the tail strips and was performed mainly by eye. I
constantly checked the instruction sheet and tried to position the
strips as closely to that position as possible. The strips are
multiple pieces with a lot of trimming and red paint to cover
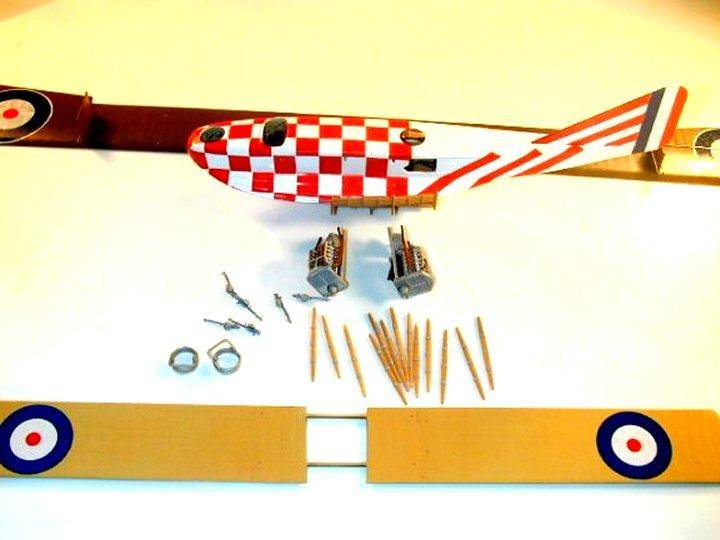
where I didn't. The wings and tail planes are PC-10 and Unbleached
linen, glossed and decaled prior to assembly. After the painting
and decals were complete, I removed the waist gun doors from their
white glue and glued them in the open position.
Wing Assembly
The instructions
show the entire upper and lower wing assembly as a single step and
competed prior to joining it with the fuselage. It appears to an
excellent idea. If you use this method, make sure the slots are
trimmed so the the lower wing drops all the way to the bottom of
the slots. It will leave a gap but this gap is later filled with
an engine support strut.
I
chose to cut the spars joining to lower wing and slide the wings
halves into the fuselage. The reason for adding the spars is
apparent as there would be very little surface for glue to hold
the lower wing in place. I was able to get liquid glue to flow
down the spars. I then immediately added the lower wing braces and
my fit was close to perfect.
|
 |
|
The next step
was to mount the 12 wing struts on the lower wing. The top wing in
then turned upside down and the model is laid over it. Be careful
if you follow this method because the wing is painted, decals are
applied and the wing dams are in place. I made sure of my
alignment and then glued one strut at a time until all 12 were in
place. Then with exterme care, I turned the model over and put it
in its docking cradle. The docking cradle is essential to build
this kit. I then mounted the two center struts but I had to make
them as they were too short. I must say that for the sheer size of
this kit, the top wing assembly was one of the easiest I have ever
done.
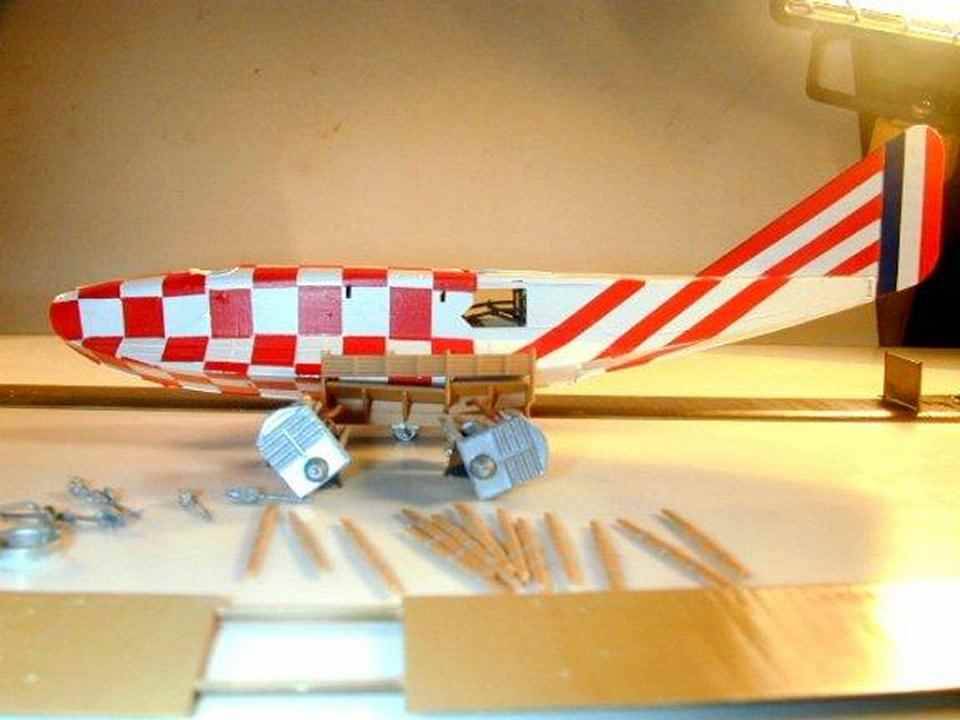
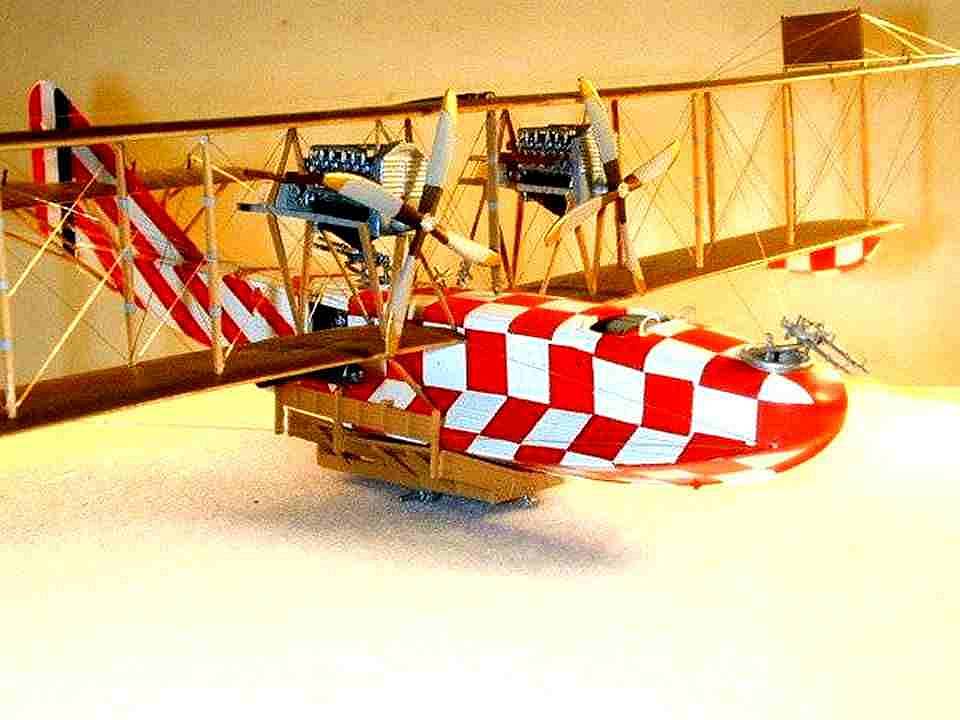
After
the struts are in place, the engines are attached. They did not
get better with age. Here is the one area that the instuctions are
vague and the lower struts did not fit without a lot of trimming.
After the engines were mounted and glued with the lower support
struts, the upper struts were added. The rear uppers at least
pretended to fit. The front uppers didn't even come close. Looking
back, if the radiators had been left off, I would have had an
easier time with the front uppers.
Final Assembly
and Rigging
At this point
all of the last little pieces are added with the exception of the
machine guns. The support struts from the engines to the fuselage
are added, all control horns are attached, (There are 20 of them),
and the gun rings. Any touch painted was done and the model is
ready for rigging.
This
was a very easy model to rig due to its size. Using DURAS, the
main rigging is only two pieces of line. Starting in the middle of
the wing, about an 18" piece of line is laced in both
direction, top and bottom. There are only two glue points to
perform 75 percent of the rigging. The remainder of the rigging is
installed and with a lighter line, the control lines are added.
With the rigging
completed, the machine guns were added along with the props. All
touch up painting was done and the model was classified as
complete.
Conclusion
This
is a very impressive looking kit and RODEN is to highly commended
for giving us WW1 builders a kit we never thought we would see in
injection mold. This is the largest kit in my collection, being
about 1" longer in wingspan than my Ilya Moumets. I do feel
the kit is vastly over engineered with far more parts than are
necessary. Others may find the numerous parts just what the doctor
ordered; I however did not. The biggest challenge will be the
engines. Be prepared to spend many hours per engine getting the
fit right.
I estimate it
took about 25 hours to build the kit, the engines taking the most
time. The color scheme took less time than building the engines.
My thanks to
Matt Bittner for sending me the kit and RODEN for supplying the
kit to Matt.
References
Flying Machines
Press, Great War Aircraft in Profile # 1
|
|