Guest article by Eric Gallaud - click here to go to his web site - it's well worth it, for First World War scale modeling. |
|
Guest article by Eric Gallaud - click here to go to his web site - it's well worth it, for First World War scale modeling. |
|
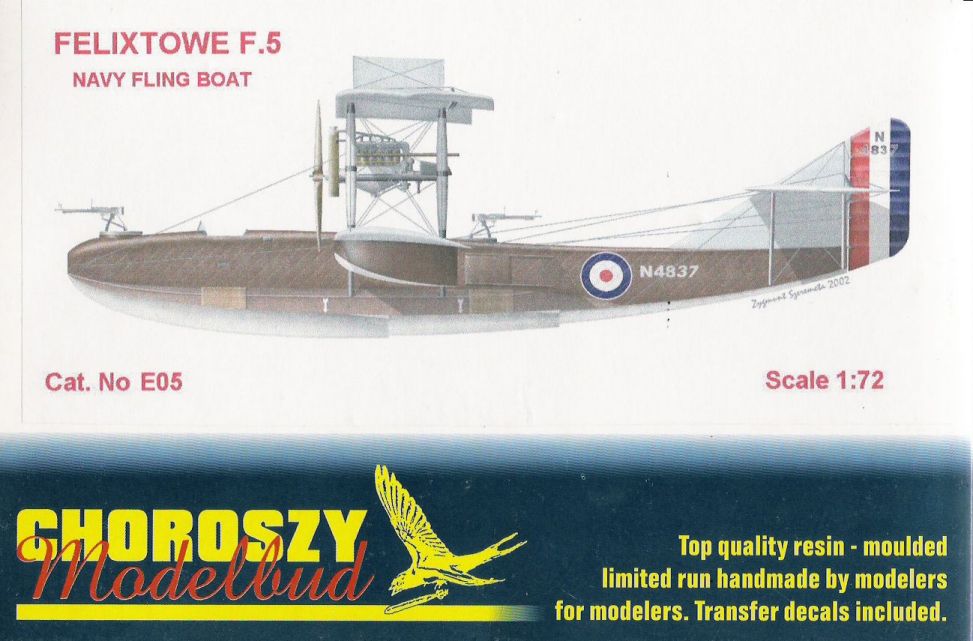
The box
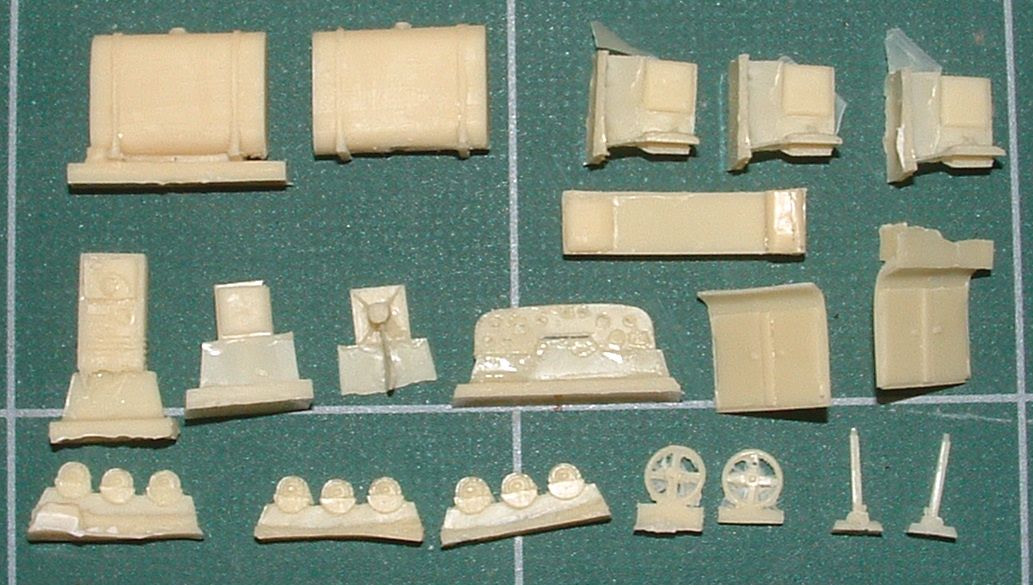
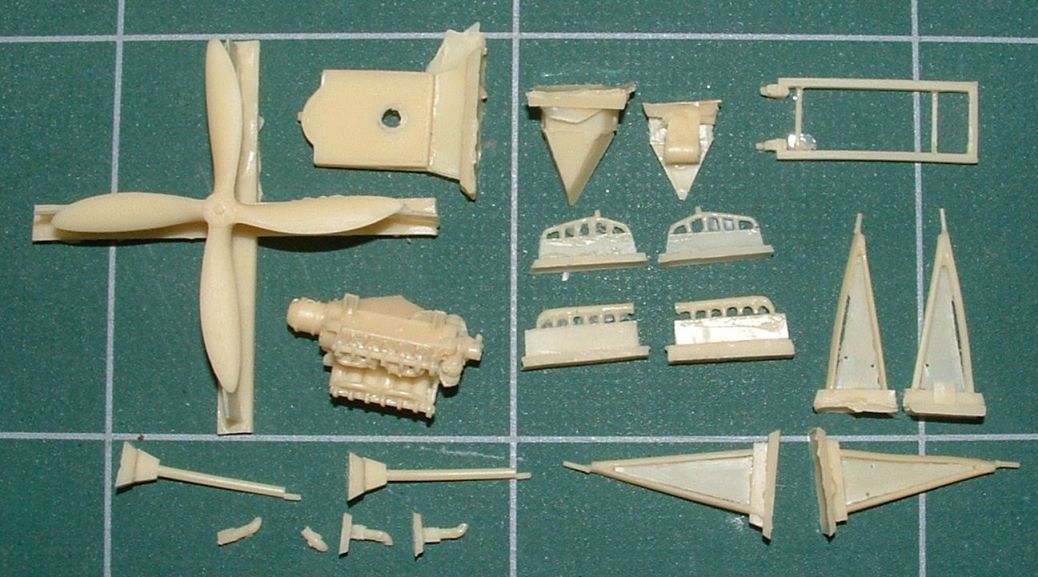
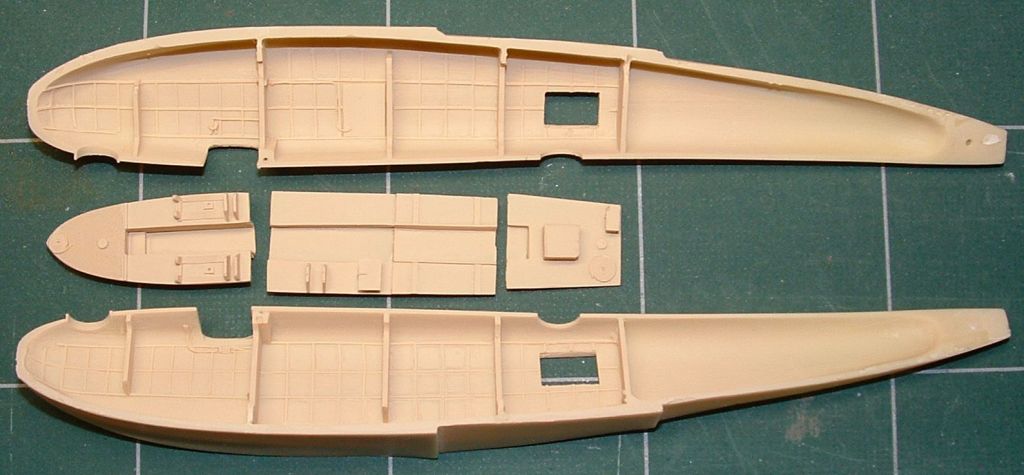
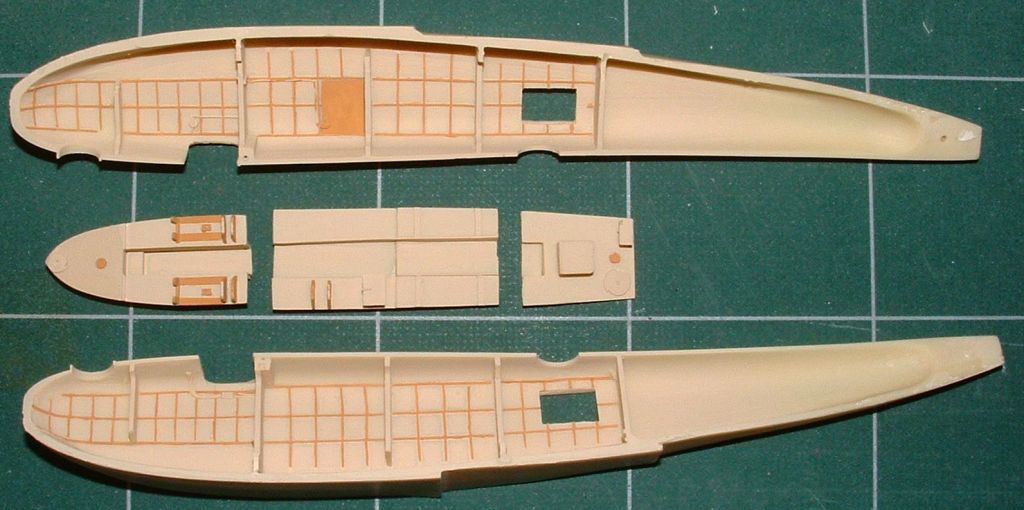
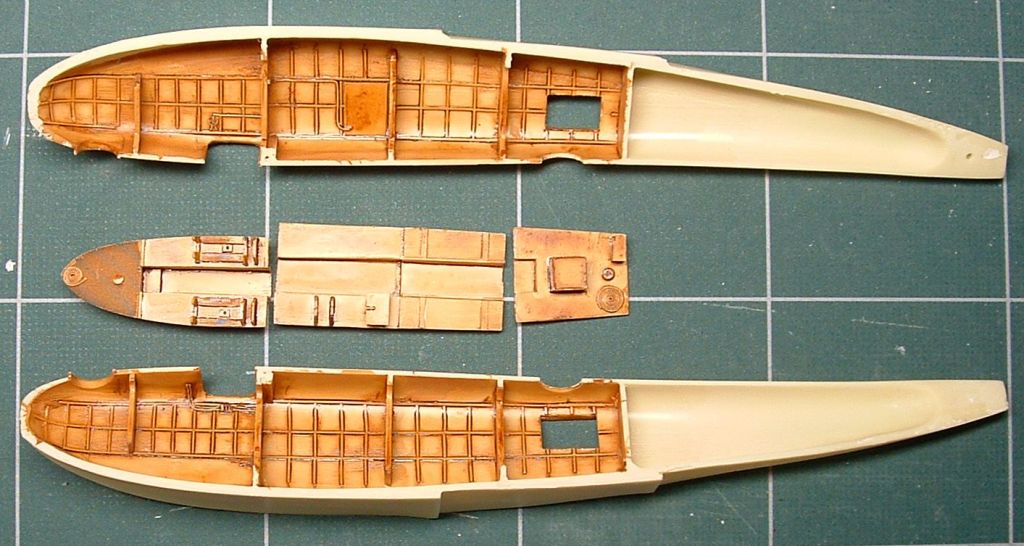
The parts
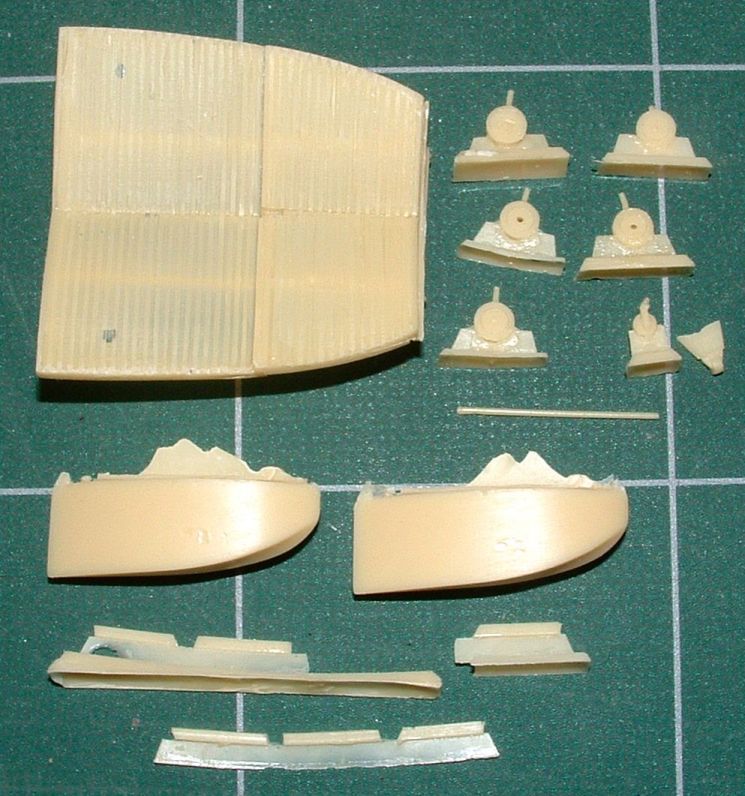
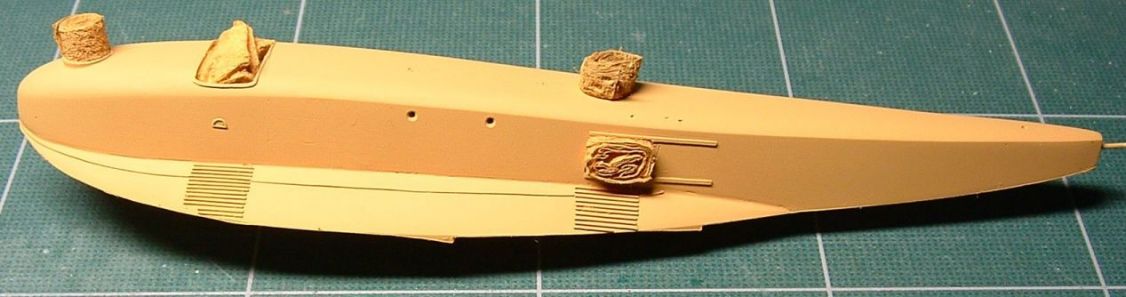
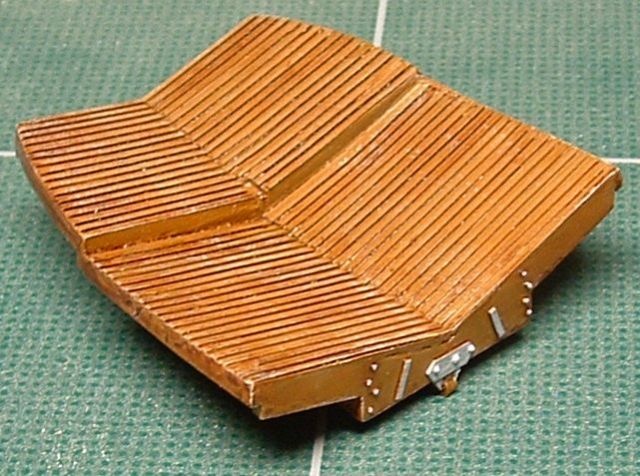
The fuselage
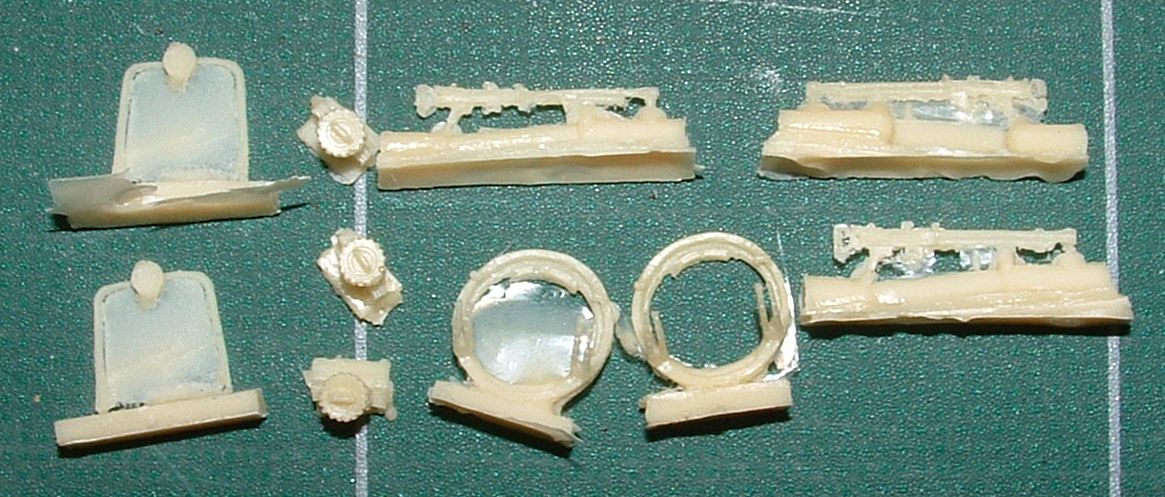
The parts inside the fuselage
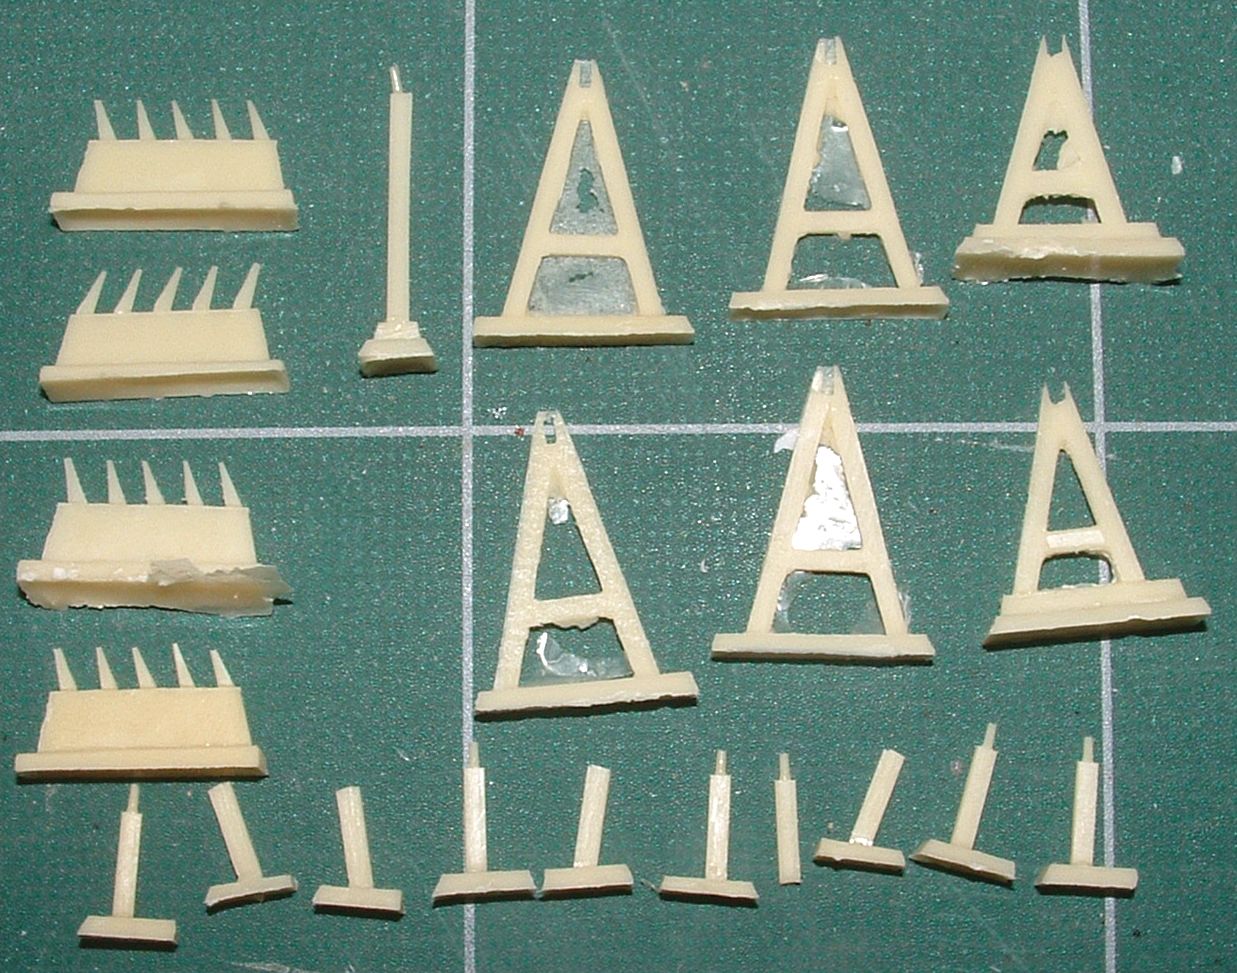
The supports and control horns
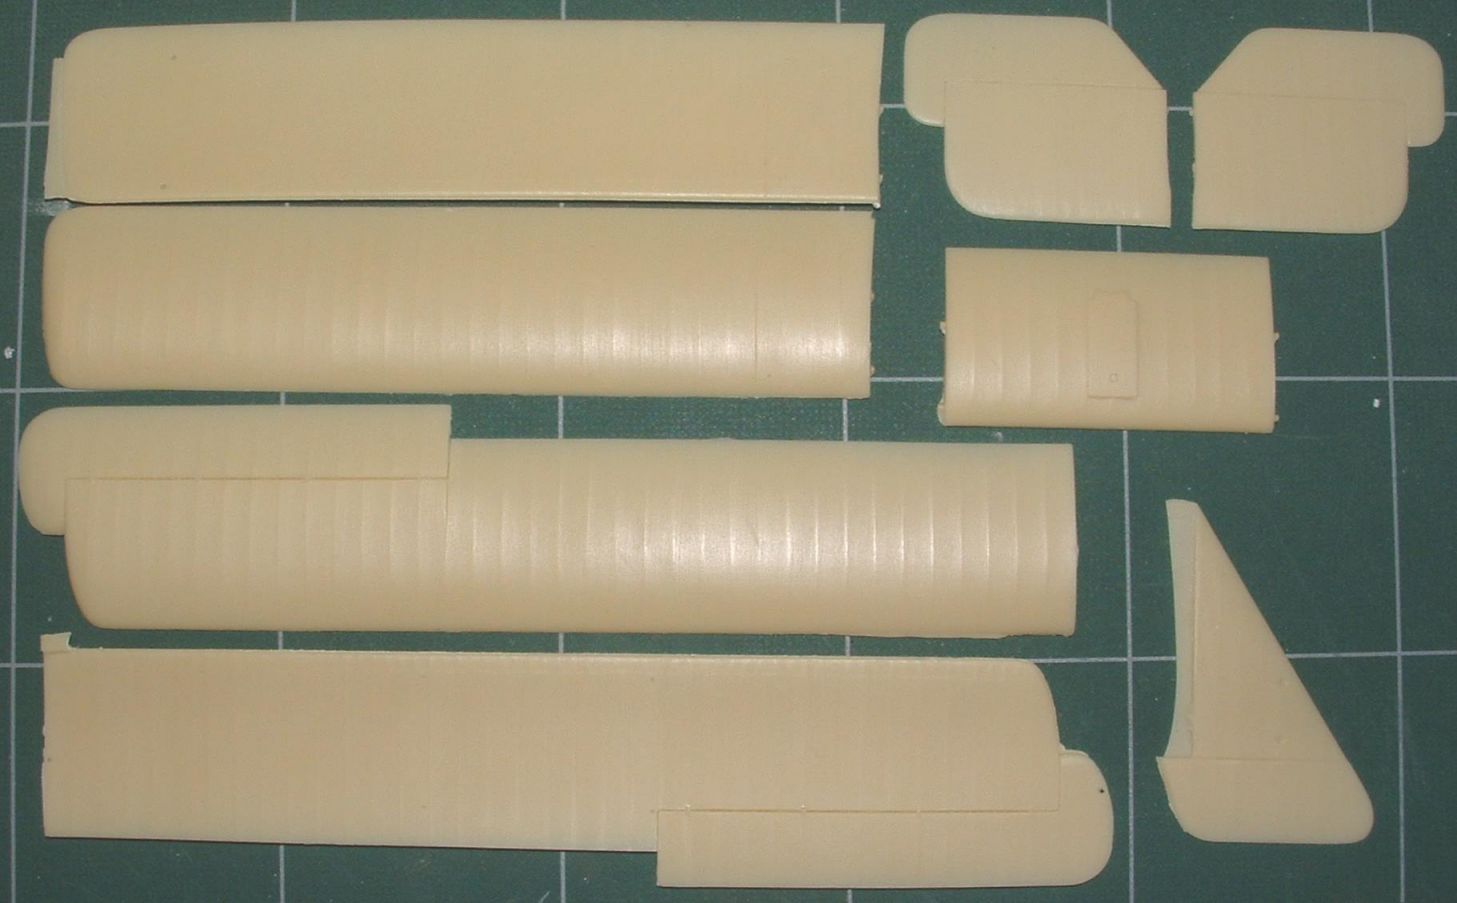
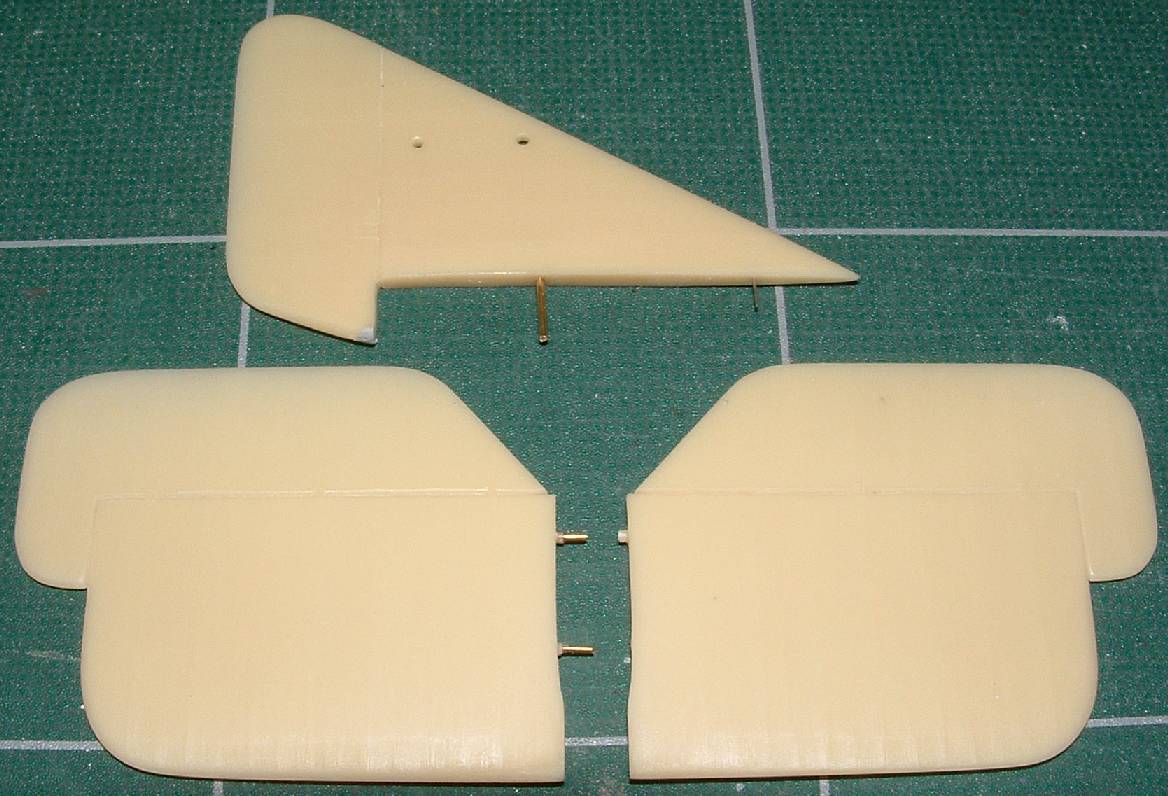
The wings
One engine
The machine-guns
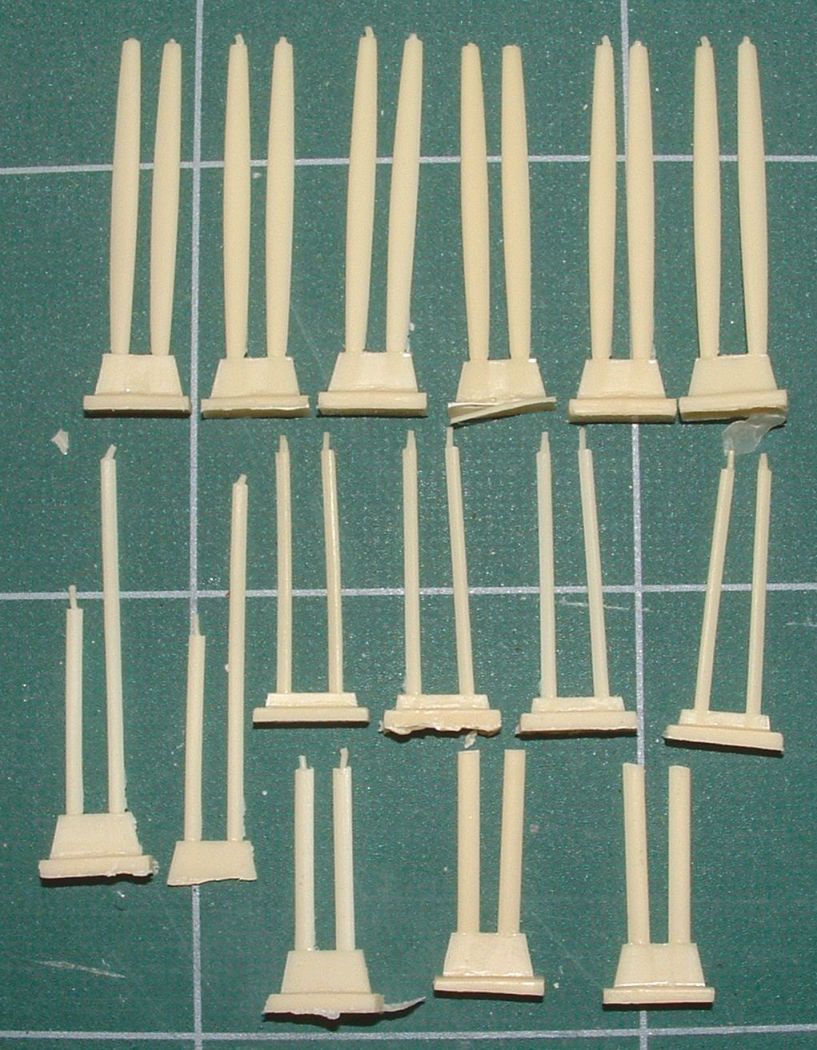
The struts
The beaching trolley and wing floats
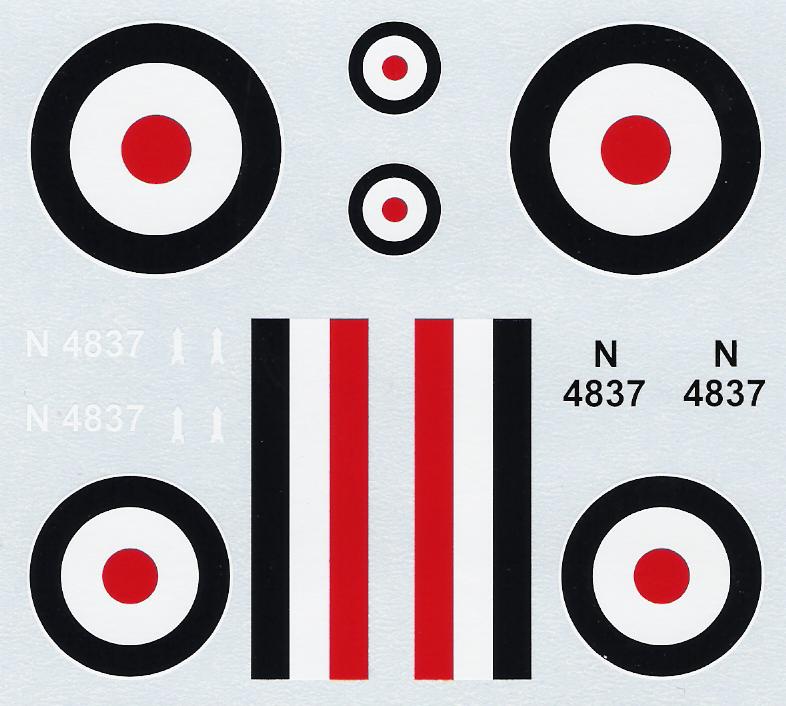
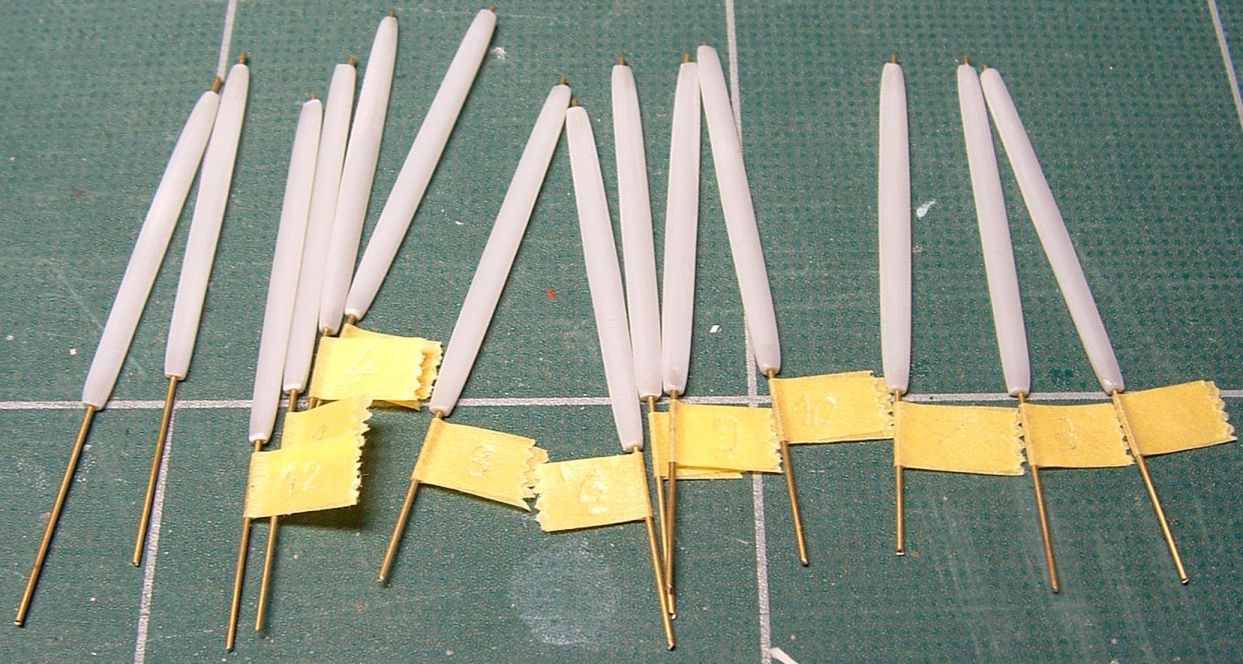
The decals
Kit assembly
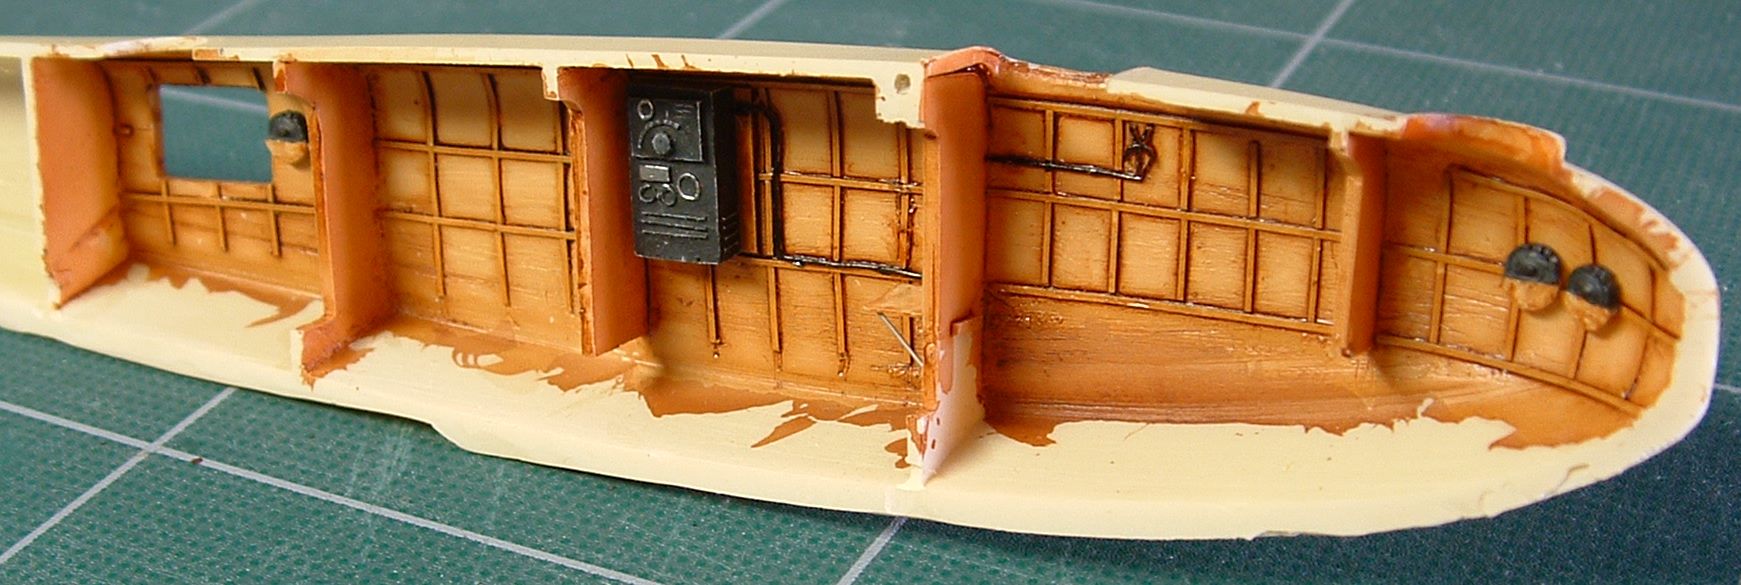
The fuselage
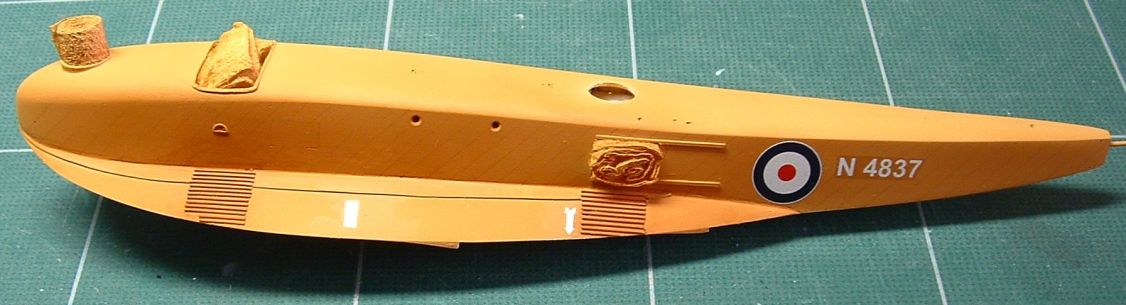
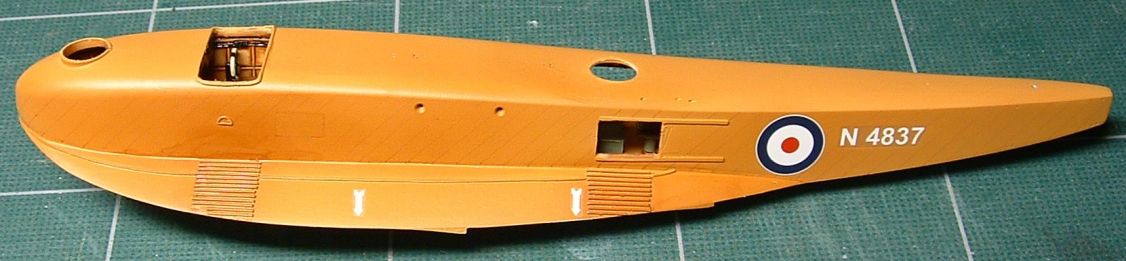
Logically, I start with the fuselage. The 2 half have a good fitting, on the other hand, the 3 floors must be adjusted. After a lot of test, let's go to the painting.
First a coat of Humbrol 121 "Matt pale stone" with an airbrush.
Then, the structure and some details are painted Humbrol 63 "Matt sand".
After at least 24h to dry, I handbrush a coat of Klir (Future equivalent in France) which gives a semi-gloss finish, necessary for the next step.
The following step is to handbrush a coat of "Flesh wash" from Citadel. Be careful, you have to paint fast because this ink dry fast and, in this case, let some unpleasant traces.
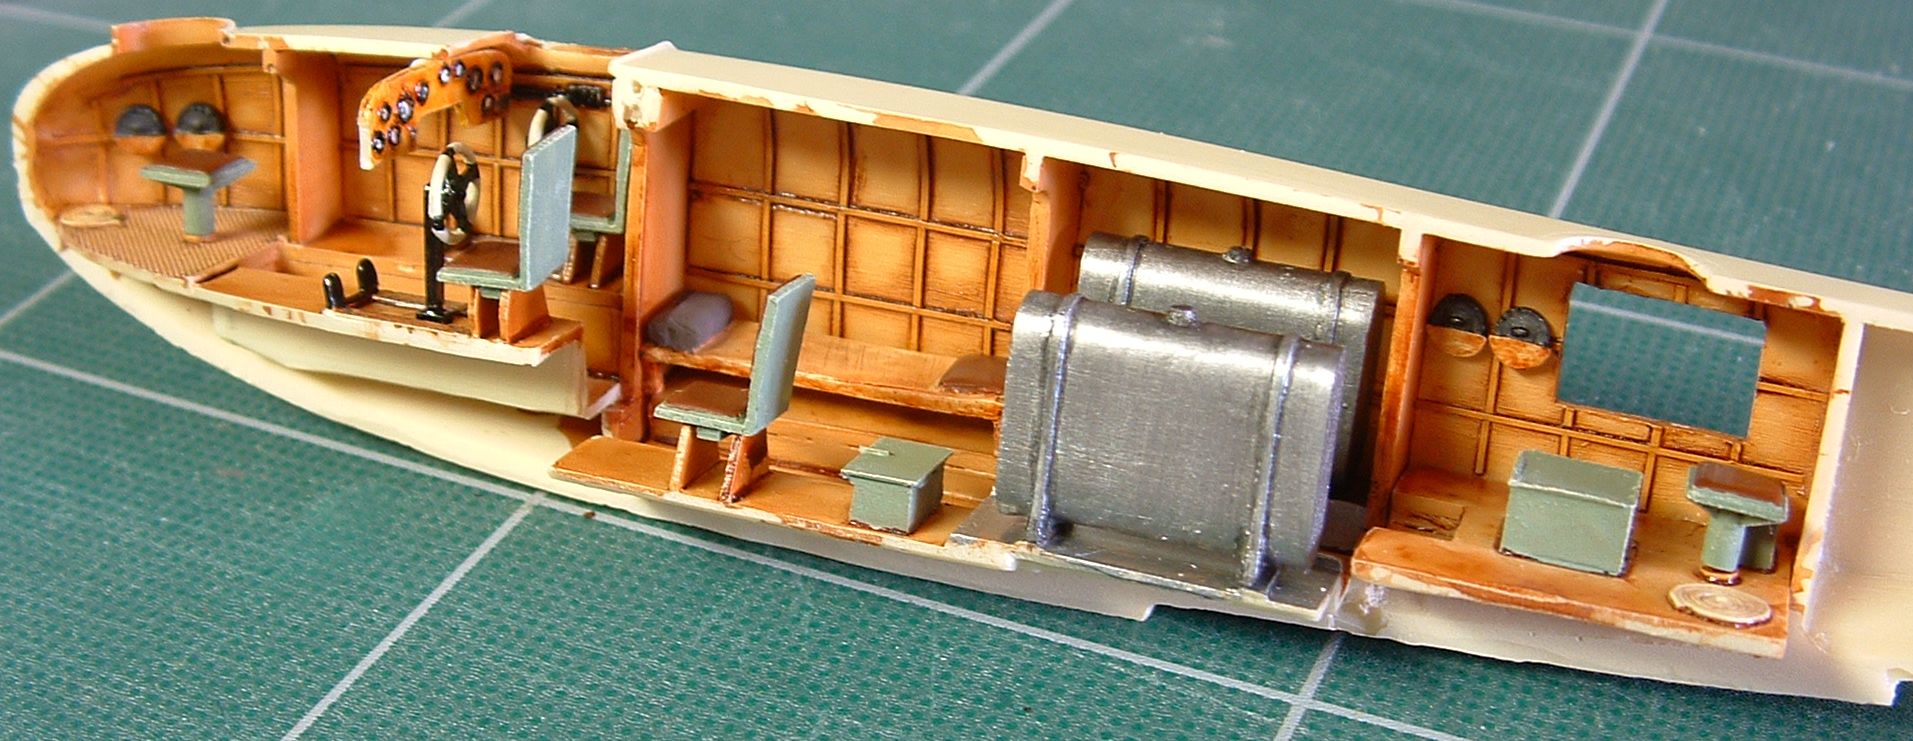
Filling in the fuselage
I fill in the fuselage with the various elements already prepared :The seats are painted Humbrol 78 "Interior green", following by a dry brush with a lighter colour.
The tanks are painted Citadel "Boltgun metal" before to be washed with black ink from the same manufacturer.The ropes, moulded on the ground, are painted Citadel "Bleached bones" and are washed with "Flesh wash".
The black of the ammunition drums is made of a coat of Humbrol 33 matt black then Testor "Noir Metalizer" handbrushed.
All of the elements are glued with thin or thick CA glue.
Fuselage assembly, beginning of the wings
The fuselage assembly, always an important step.
First of all, I put together the 2 half fuselage and tight them with clamps. Then I add some thin CA glue on all the joint.
When dry, I sand all of the joint and fill the little gaps with the same glue than above. Be careful, it is necessary to proceed step by step, put some glue on a small surface, wait for drying and sand it immediately to avoid it to be too hard. For the big gaps, I use some mastic.
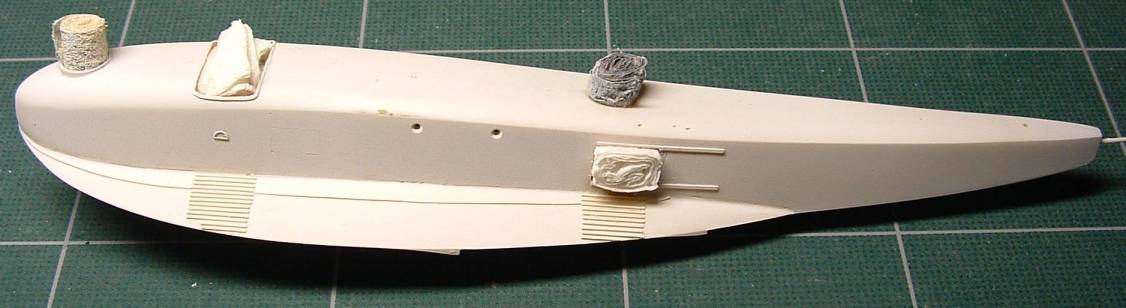
All of the opening of the fuselage are closed and I spray a coat of white paint as primer and as definitive colour for the bottom of the hull. Then, this coat is sanded to have a smooth surface.
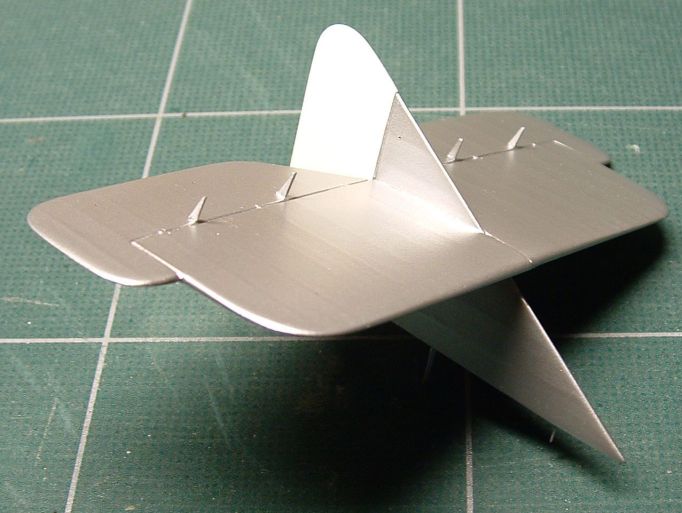
I start the rudder. First, I add some 0.6mm brass wire to attach the wings together, and for the whole assembly onto the fuselage. I must do strong attachments regarding the size of the plane. The rear wings wingspan is larger than a Fokker Dr1 !!!
After that, I spray a coat of white paint as primer, sand it and build the rudder.
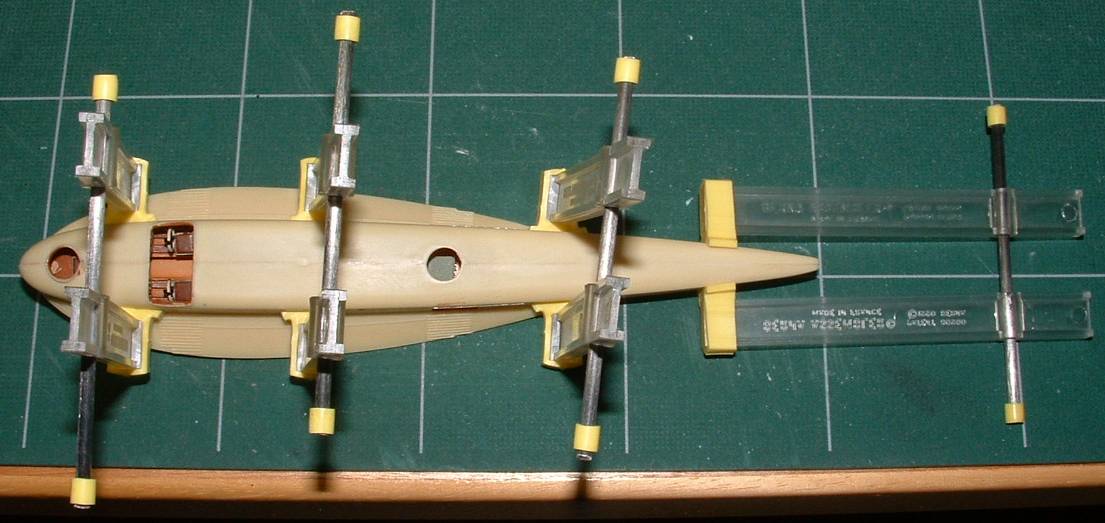
Then I prepare the main bottom wings assembly. Regarding the wingspan, I must do a stronger attachment than above. I use some 0.8mm piano wire which pass through the fuselage.
After that, I prepare the wing floats assembly. I add some brass wire in order to have a precise fixation.
Fuselage and rudder painting
After the white primer coat, I airbrush a coat of Humbrol 63 "Matt sand".
Then I draw some lines at 45° on the sides of the fuselage to show the planks, with a watercolour pencil "Burnt Sienna" and a template made of Evergreen. Once ended, I airbrush a very diluted coat of "Flesh wash" from Citadel.
After that, I put the fuselage decals in place and airbrush the whole fuselage with 3 coats of Prince August satin varnish slightly diluted with their airbrush cleaner.
In the end, I was looking for a more brownish colour. I should conduct some other trials on other kits. In addition, I am not very satisfied with my decal application, I can still see the carrier film.
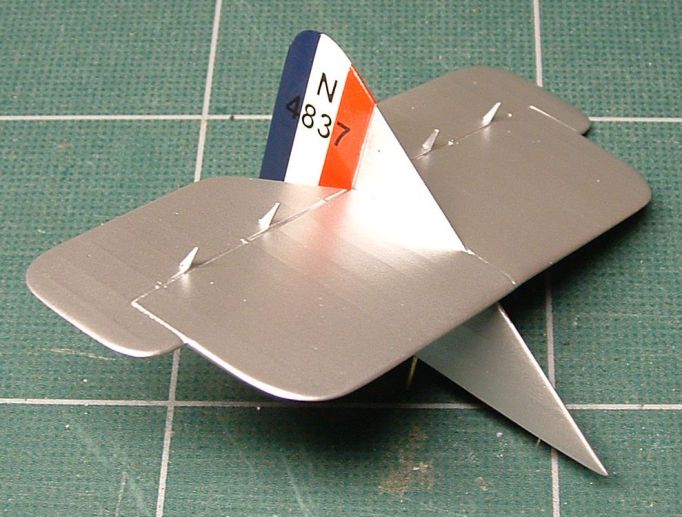
Back to the rudder.
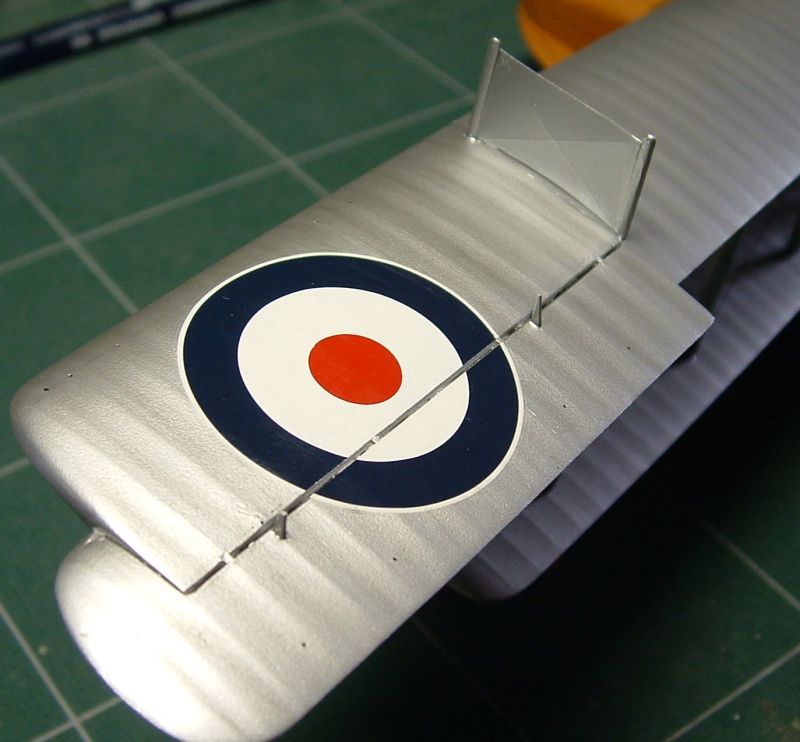
I add the control horns of the horizontal rudder, then, after masking the vertical rudder, I airbrush a coat of White aluminium Alclad.
Then, I put the decals on the vertical rudder, always a very delicate operation. I have to do some little correction, The Tamiya paints X3 Royal blue and X7 red have just the right colour.
After that, I brush the decals with some Klir.
Rudder and lower wings fixation
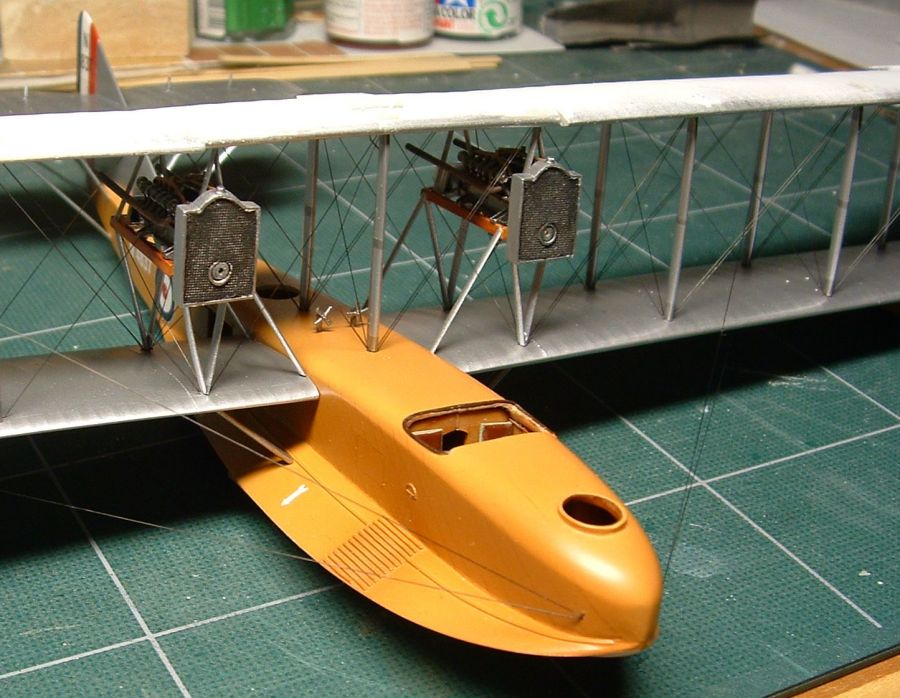
I glue the rudder onto the fuselage and begin to add the struts.
I cut and ajusted them one by one, add some little bits of steel wire at each extremities, in the wings and the fuselage, in order to have a good fit.
Once they are all in place and glued, I paint them with Citadel "Chainmail".
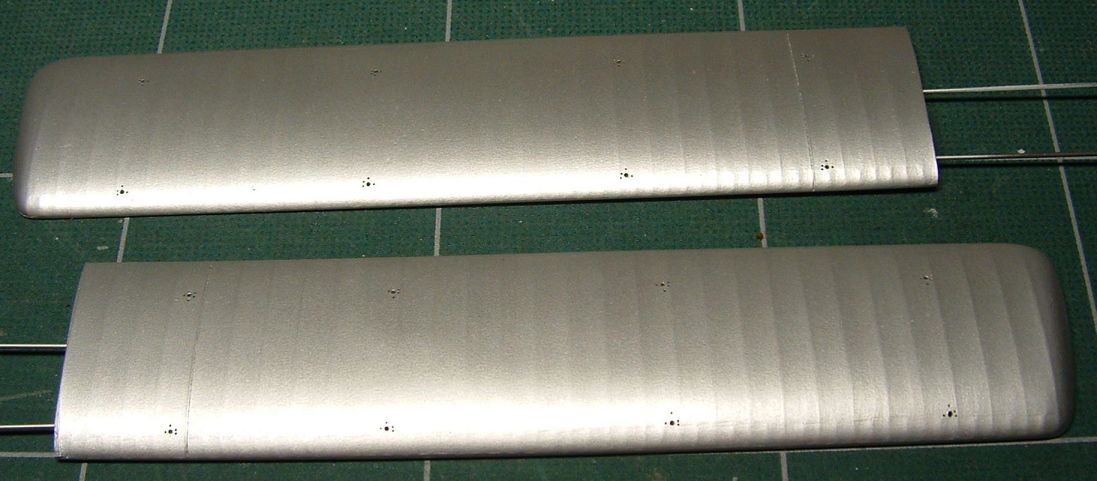
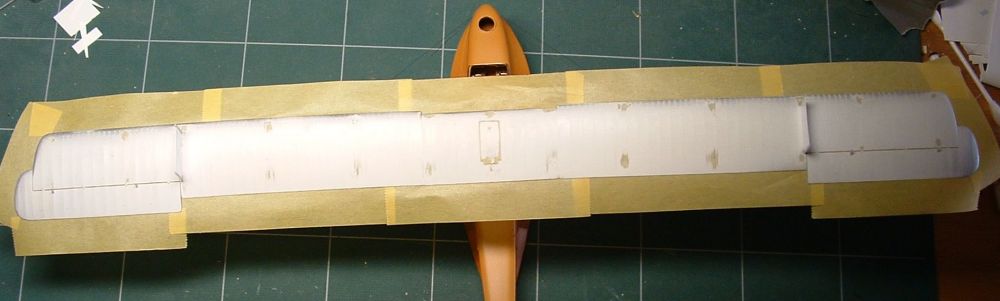
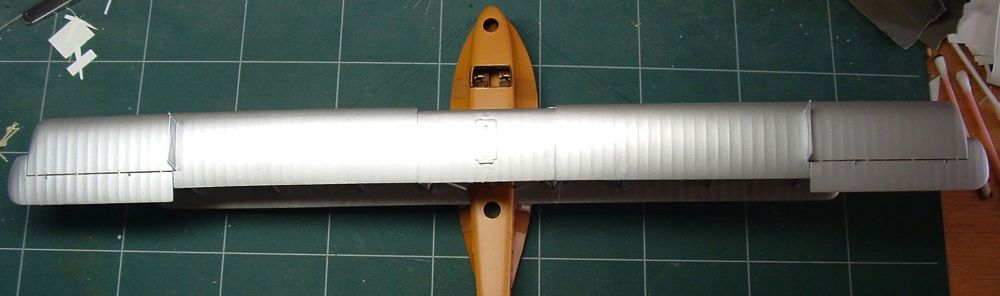
The wings receive a coat of white paint as primer, then after a fine sanding (1000 and 2000 grit), a coat of "White Aluminium" Alclad.
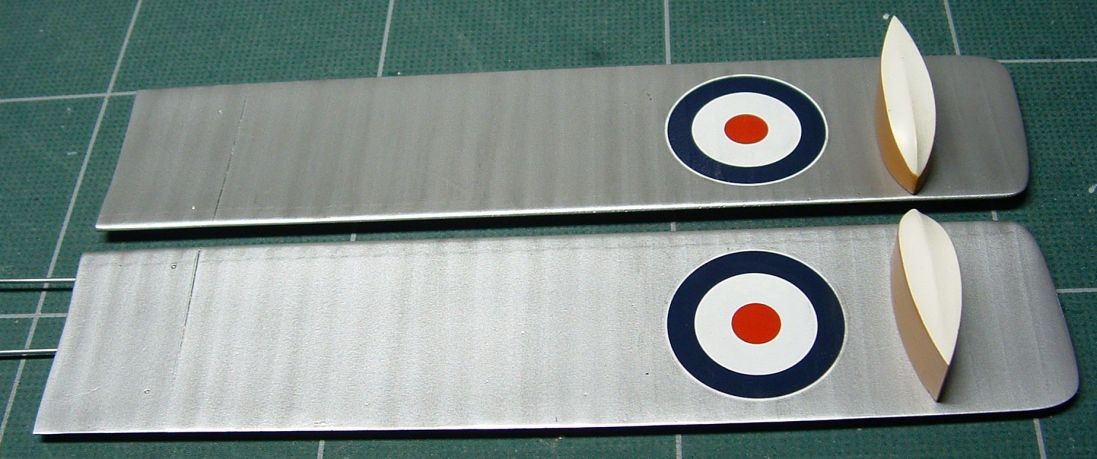
The roundels are added. Once dry, I add some "graphite" pastel chalk between each wing ribs with a Q-tip.
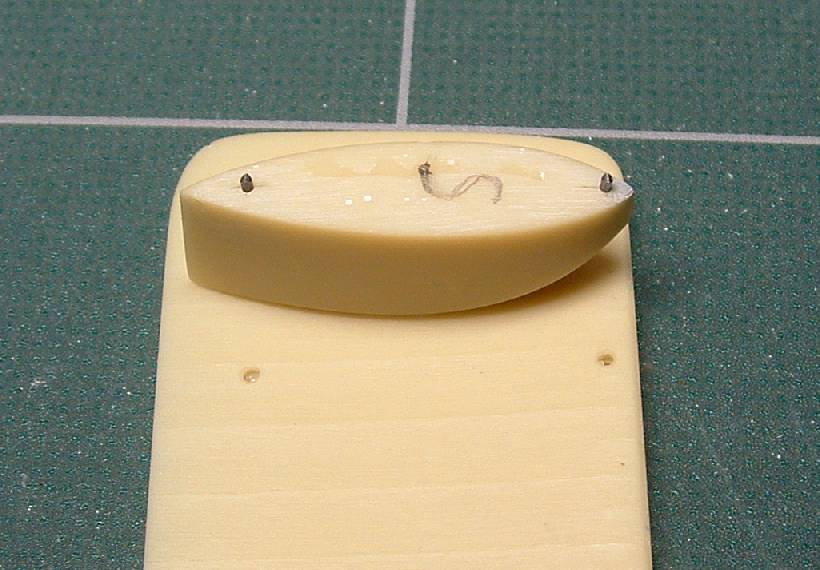
After that, I glue the wing floats.
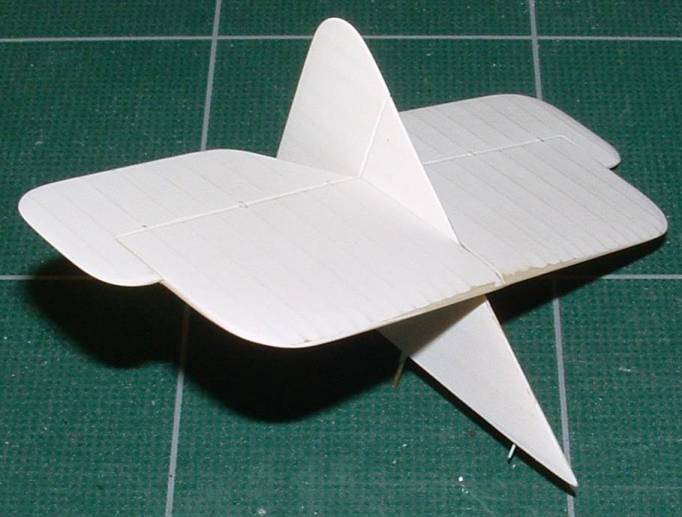
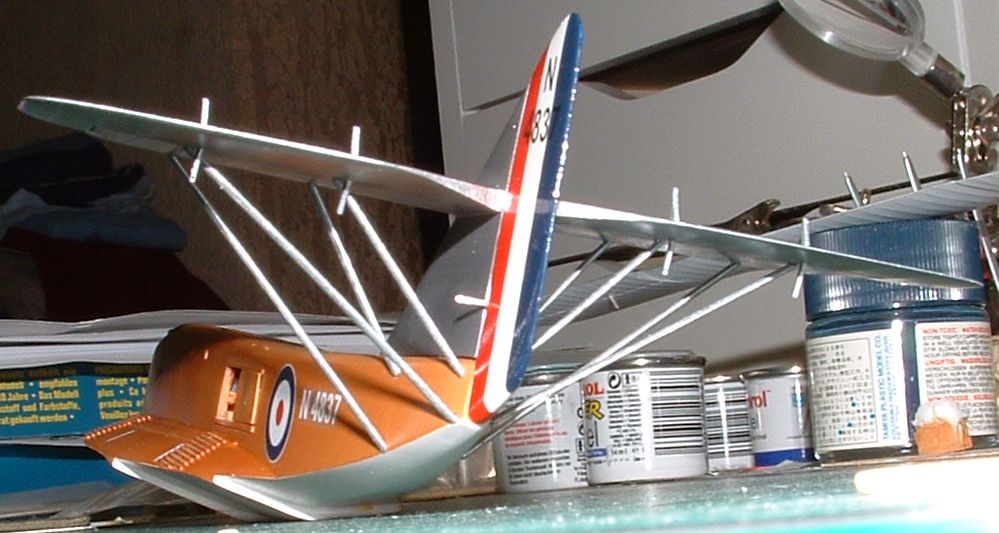
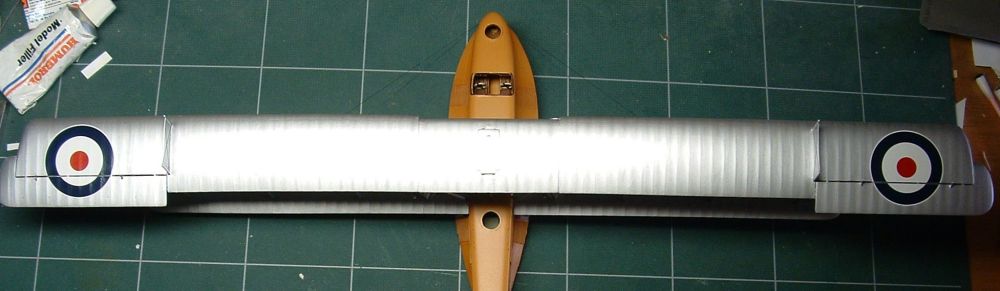
At last, I add the wings, that's it, it looks like a plane !!! I took the picture with a Fokker Dr1 same scale on its side. Note that the top wing will be more than 10cm larger.
Between 2 wings
I prefer to replace all of the resin struts by plastic ones, made by Contrail. to avoid them to bend in the future.
First of all, I cut then at the right length.
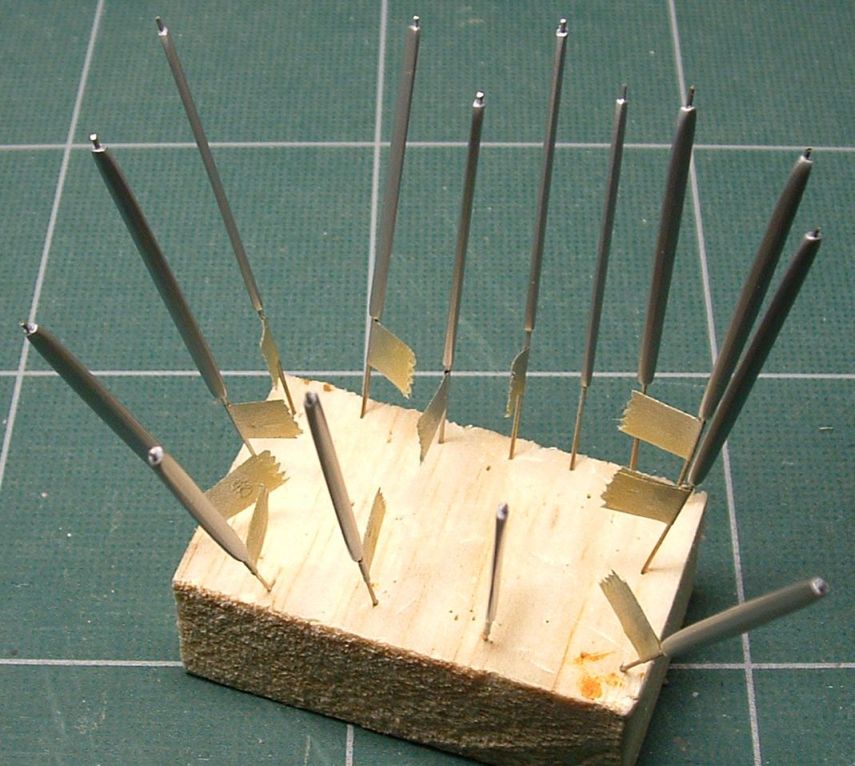
I give them the right shape and drill each side at 0.6mm diameter. At one side, I adjust the shape of the bottom of the strut to the shape of the wing, then I glue a brass rod with 1 to 2 millimetres outside them. After that, I glue a longer rod which allow to maintain the strut and add an identification. It is done with a little piece of tape with a number written on. I draw a plan to identify the position of each strut.
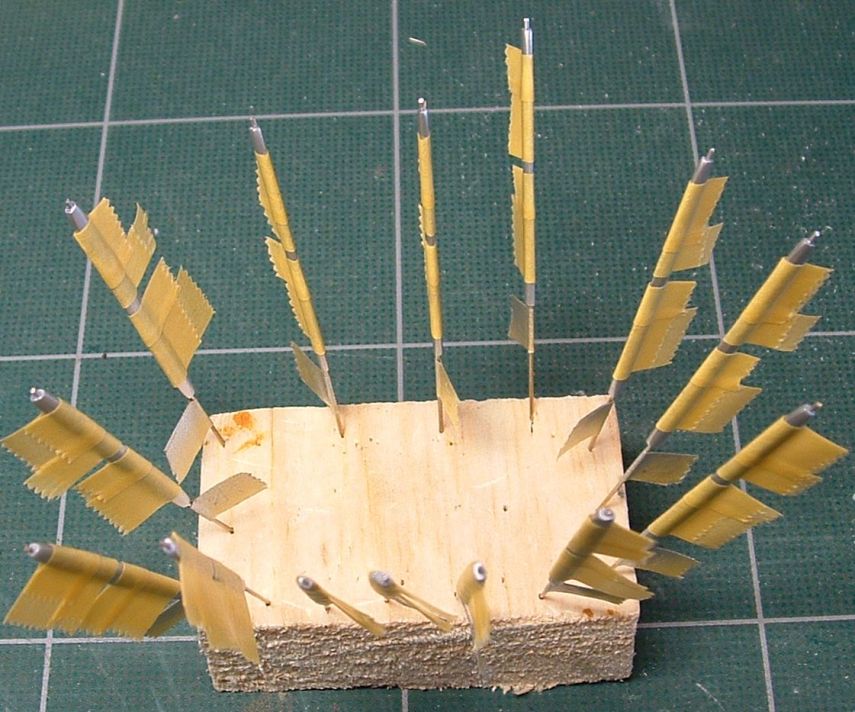
I airbrush them in White aluminium Alclad.
When dry, I mask them in order to paint some strips in Dark aluminium Alclad. The tone difference is light but adds a nice touch to the struts.
I remove the tape, et voilà, they are ready.
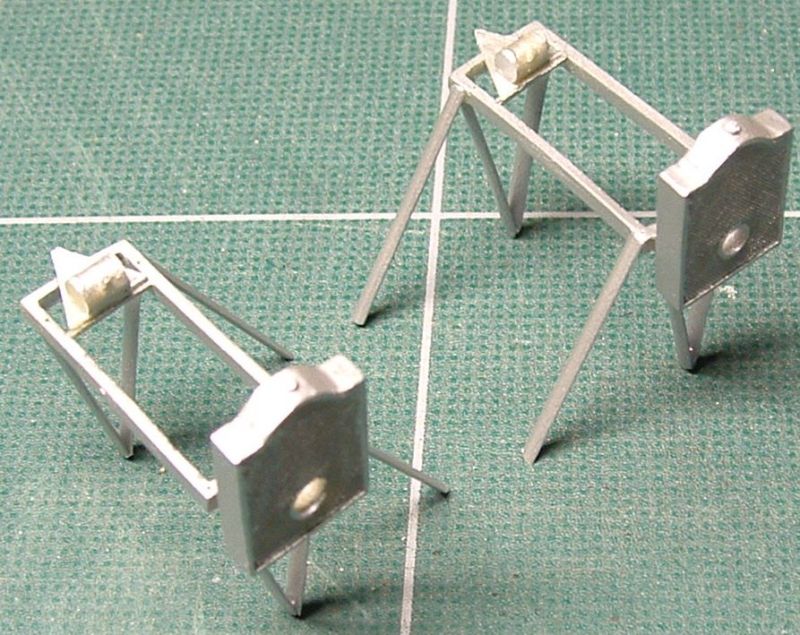
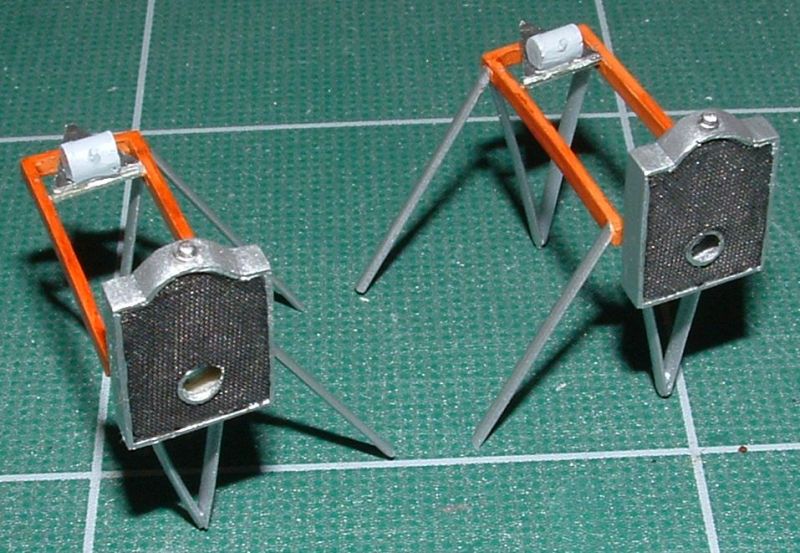
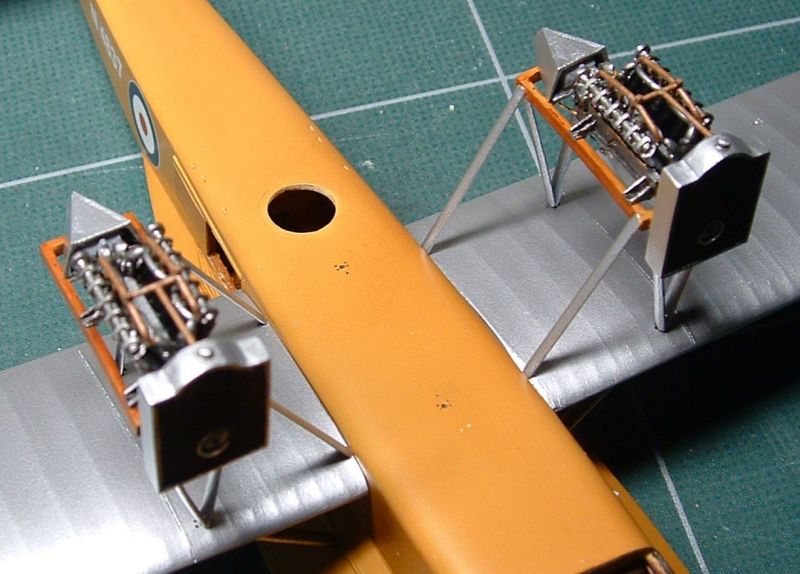
Engine bearer : no real difficulties, I just replaced the struts by Contrail plastic profiles.
The whole assembly is painted in White aluminium Alclad, then, the engine bearer frame is painted with a coat of Humbrol 63 "matt sand" and with a coat of Citadel "chestnut ink".
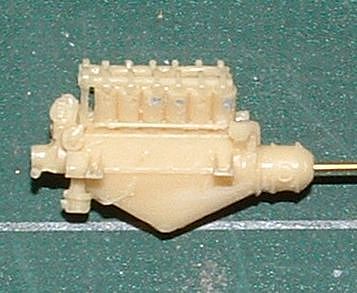
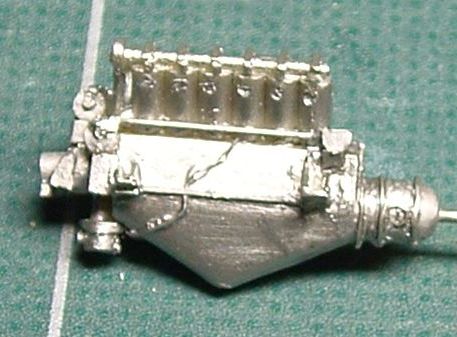
The engines : They are almost moulded in one part. First, I paint them in White aluminium Alclad. After that, the cylinder are painted in black, then I wash them with black ink thinned to add deepness.
I drybrush the whole engine with Citadel "Boltgun metal", then addition of various hoses and pipes.
I glue the engines onto their bearer and add the piping of the engine cooler.
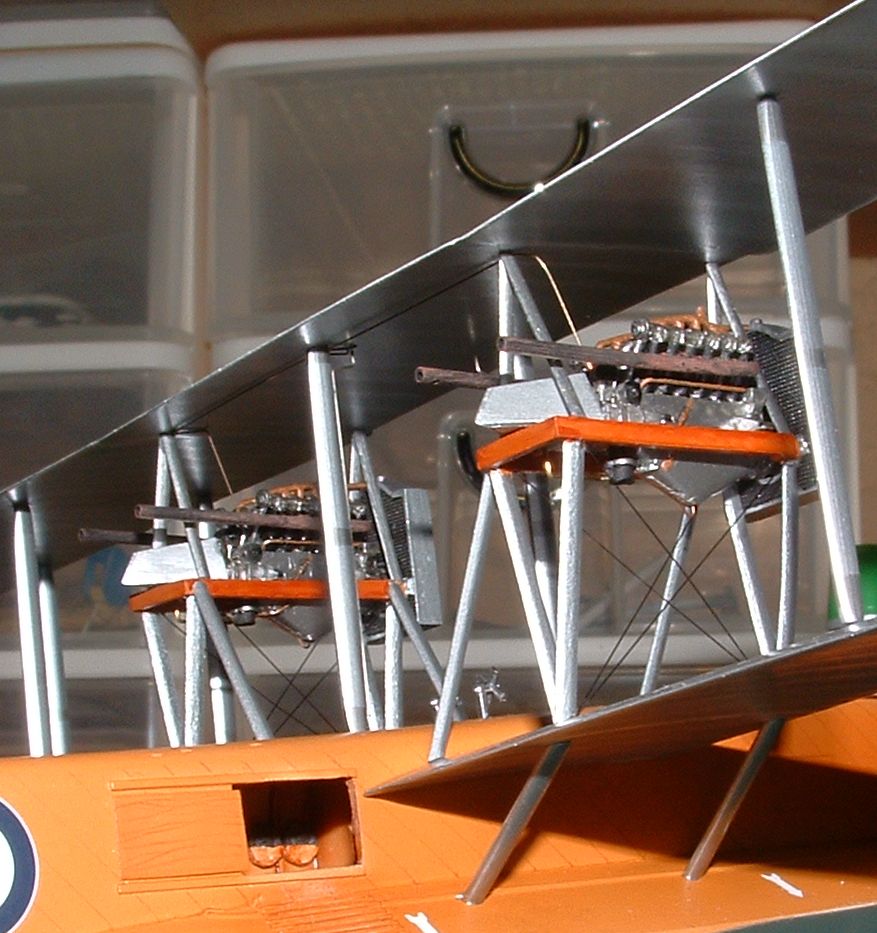
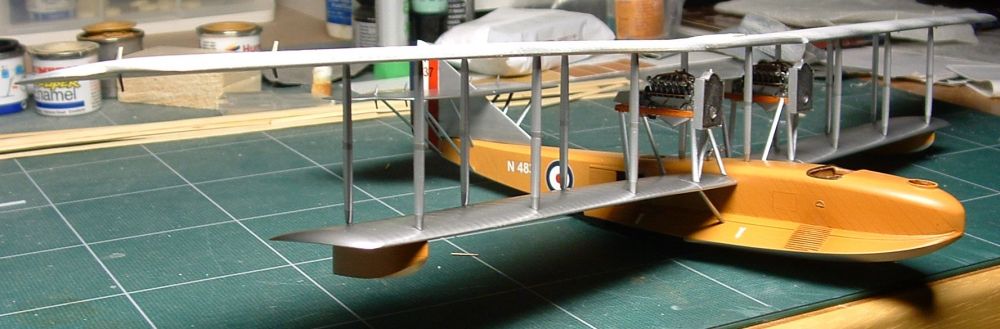
The upper wing
The placement goes well thanks to the brass rods added to the struts. At first, I place all of the struts, add the upper wing and then glue all of them with thin CA glue, by infiltration.
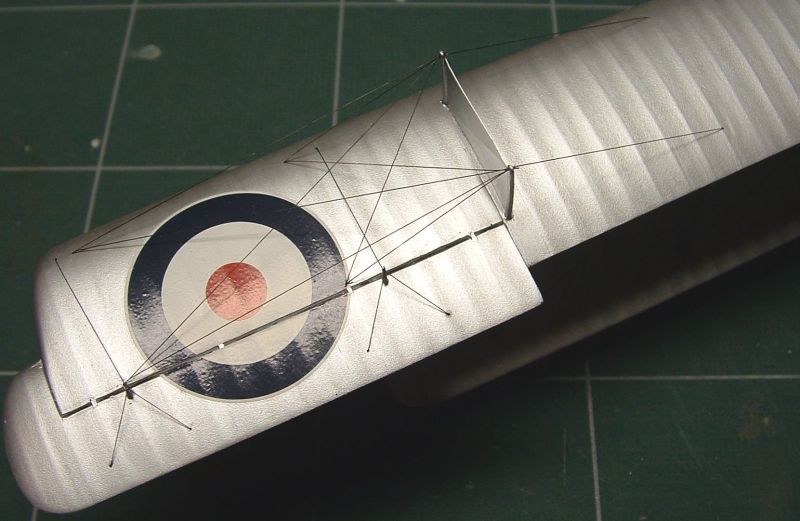
After that, I start the rigging. It is done with invisible thread tinted with a black marker.
Each wire goes through the top wing to a corresponding hole drilled in the lower wing or in the fuselage, and glues with CA glue.
When the glue is dry, each wire is tightened and glued. Once dry, it is cut and the remaining hole is filled with thin CA glue. Some wires will be added after the upper side of the top wing painting.
Working on the top of the upper wing
The vertical parts which are on the top of the upper wings are not provided with the kit. To scratchbuild them, I glue 2 struts with the right size and cut some Evergreen sheet (0.13mm thick) to the shape required. Once well adjusted, I trace the rigging place between the 2 struts with the tip of a cutter. In this channel, I glue some invisible thread (the one I use for the rigging). At last, I glue the part obtained between the 2 struts.
I can paint the wing.
First of all, I mask the circumference with masking tape and paper towel.
Then, I airbrush 2 coats of Alclad Aluminium.
And then, I add the decals.
After that, I add graphite pastel chalk between each wing rib, with a brush (short and flat shape). It is easier and more precise to use than the Q-tip.
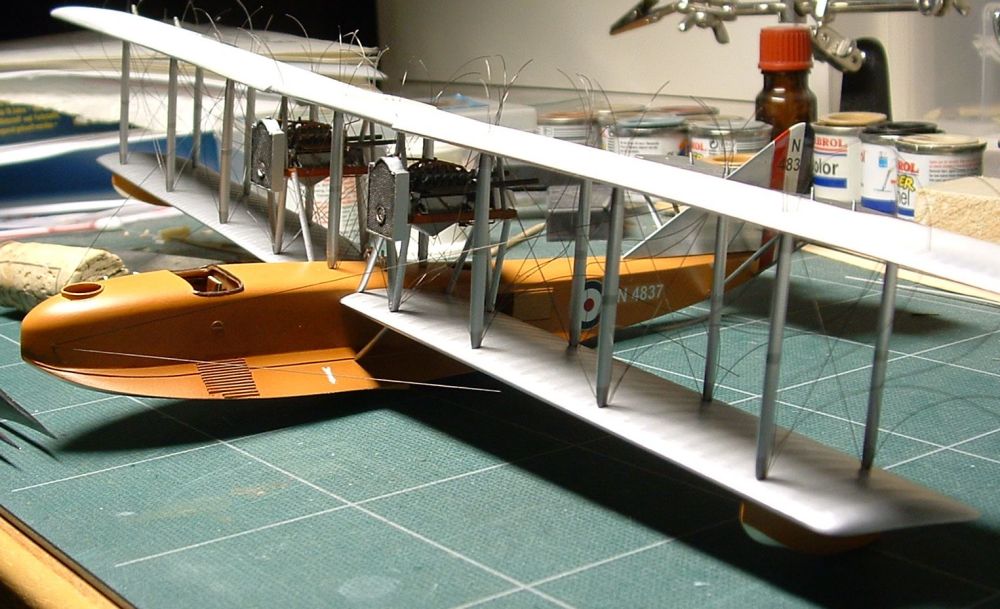
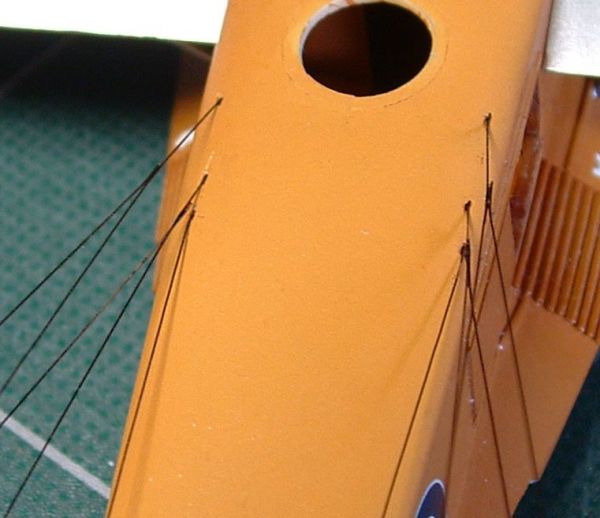
Rigging ends
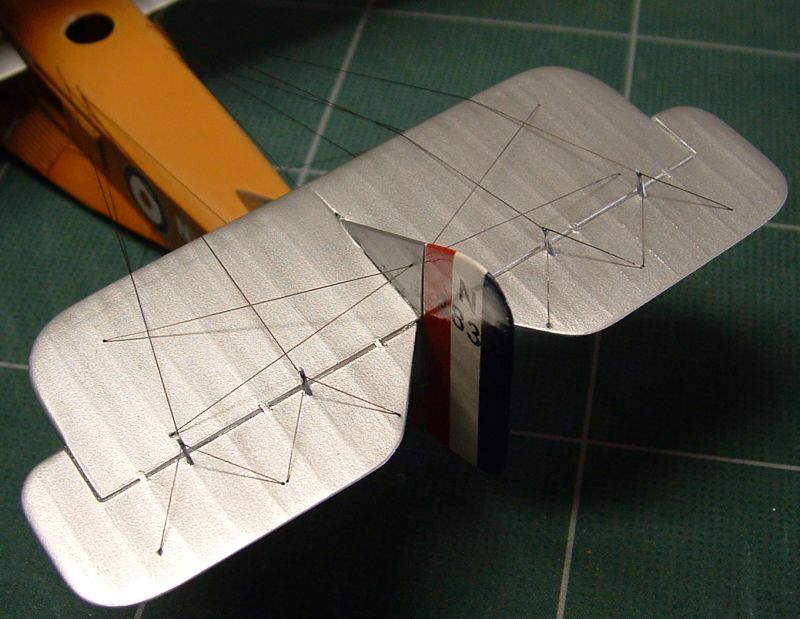
Rigging again, I ended the one on top of the upper wing. No problem to do that.
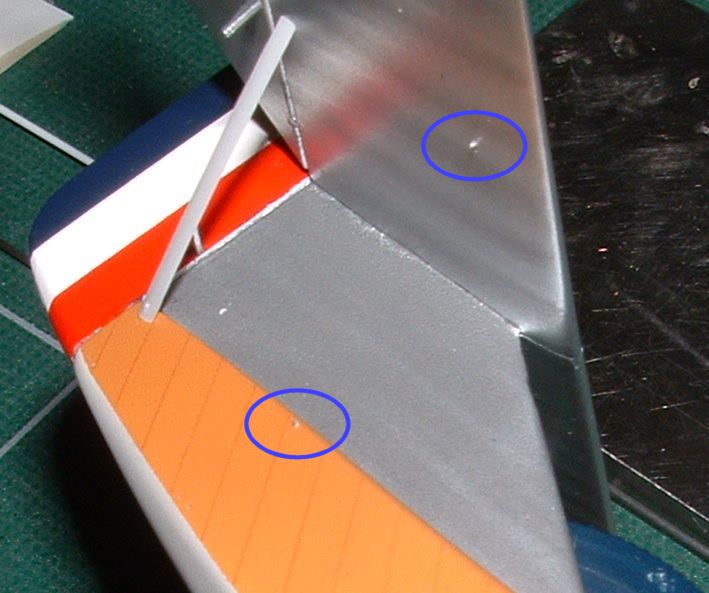
The rigging of the tail don't cause any problem, the only delicate point is to glue together the command lines of the rudder.
Finishing touches
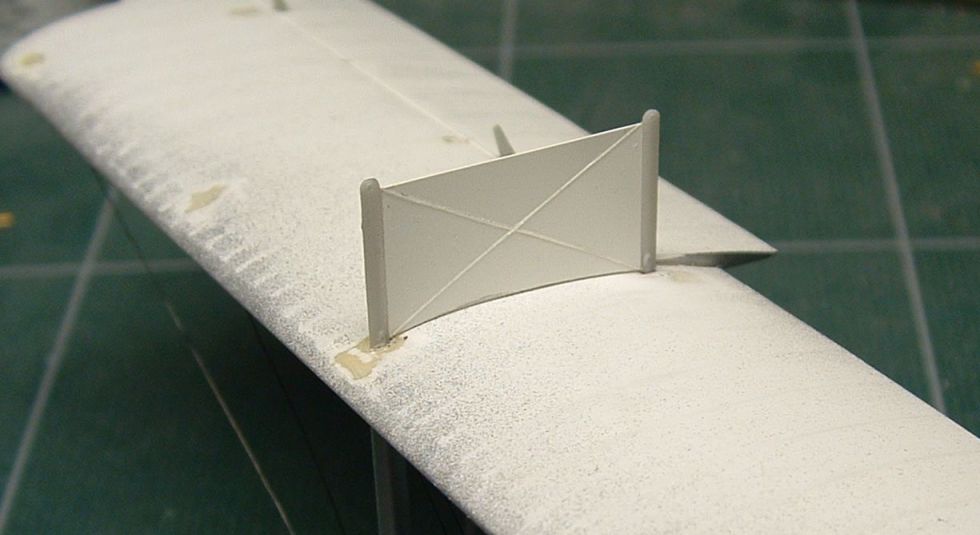
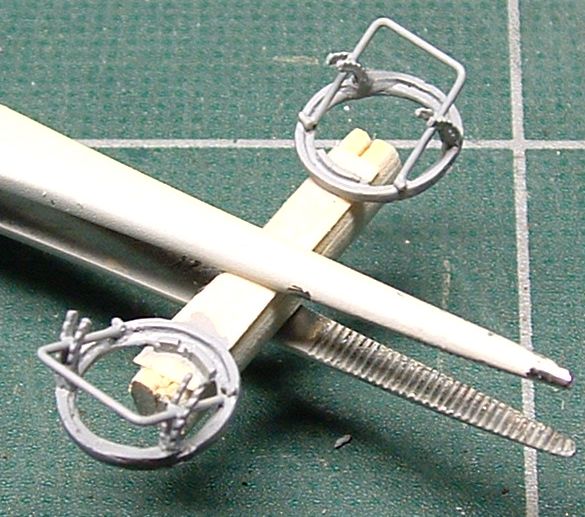
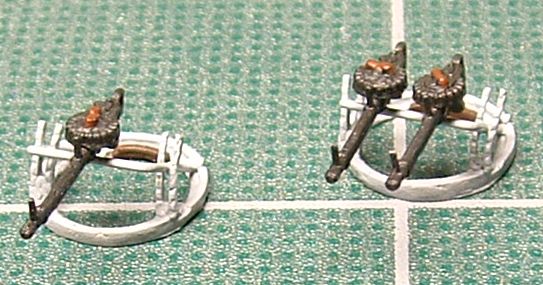
The machine guns turrets are modified, some brass rod is used to represent the MG supports. The turrets are painted in Misterkit "Battleship grey", the MG's in black followed by a coat of Testor black Metalizer
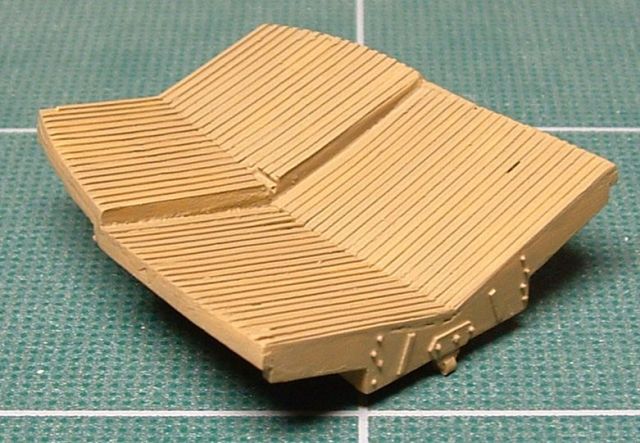
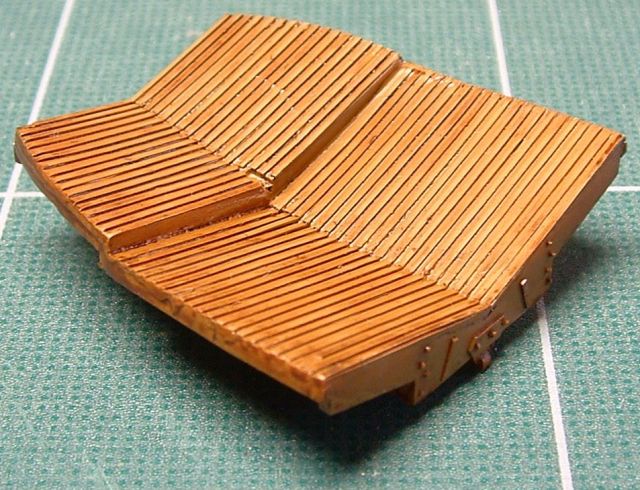
I start to paint a coat of Humbrol 63 "Matt Sand", with a brush.
Then, 3 coats of Citadel "Chestnut ink"
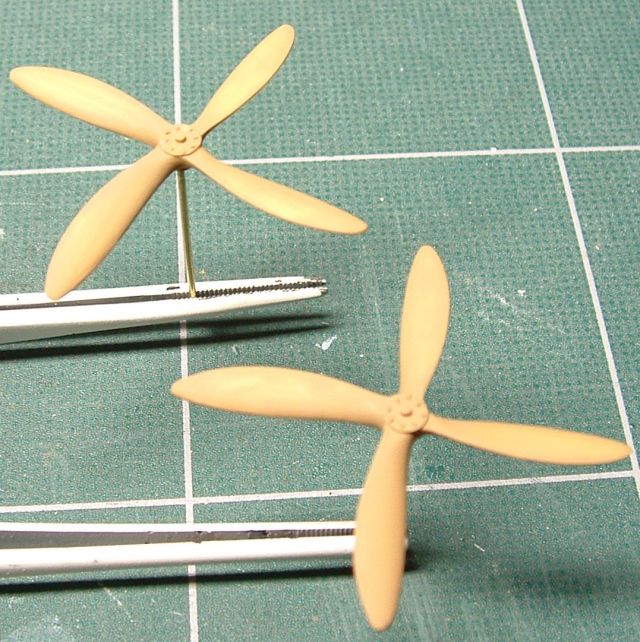
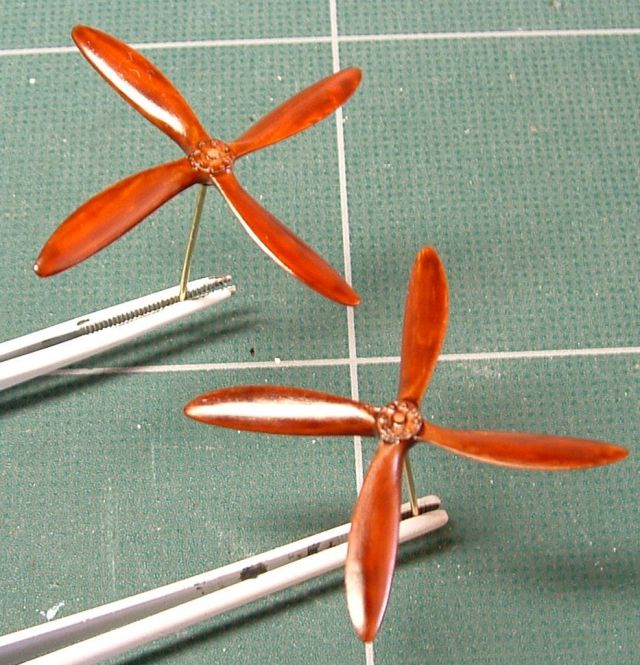
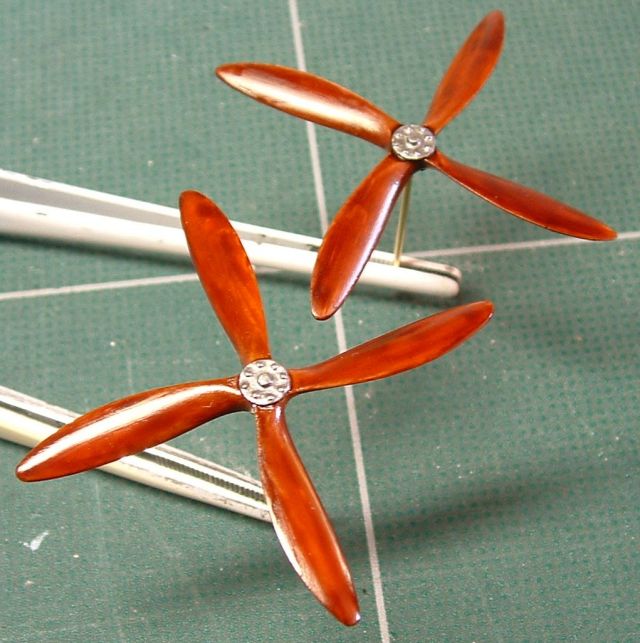
And, at last, I paint the propeller boss with Citadel "Boltgun metal"
I start to paint a coat of Humbrol 110 "Matt natural wood", with a brush.
Then, a coat of Citadel "Flesh wash"
And, at last, detail painting with Misterkit "Battleship Grey"
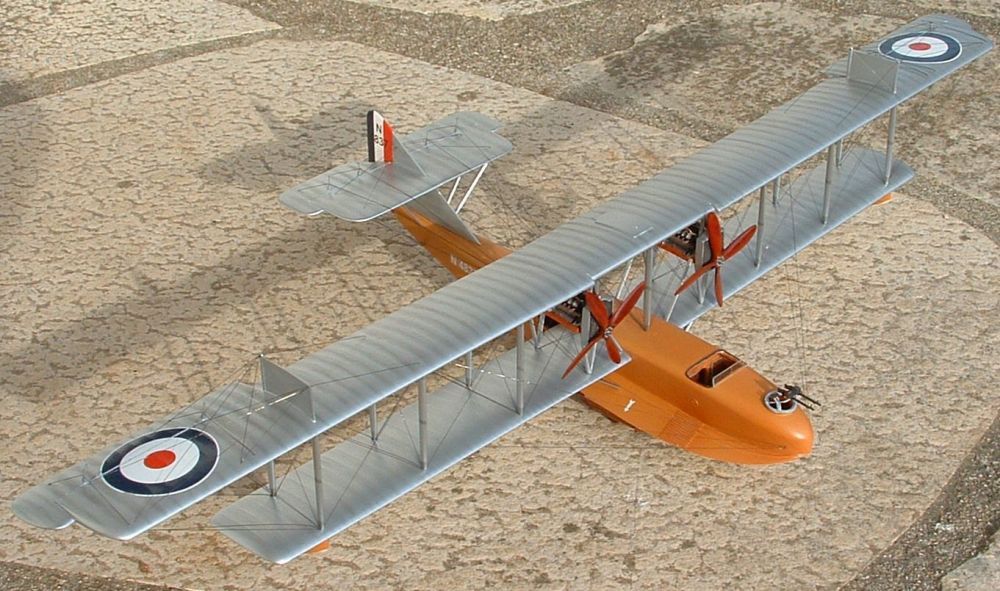
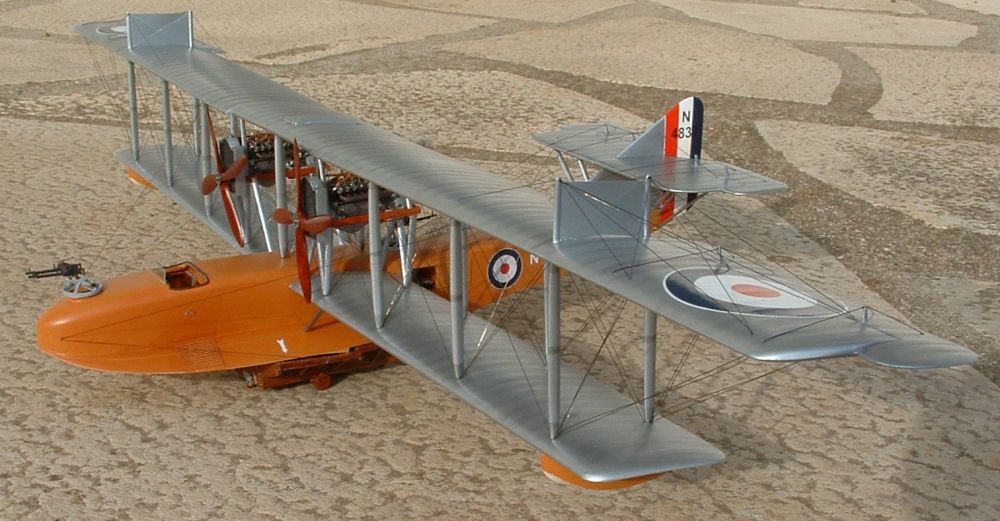
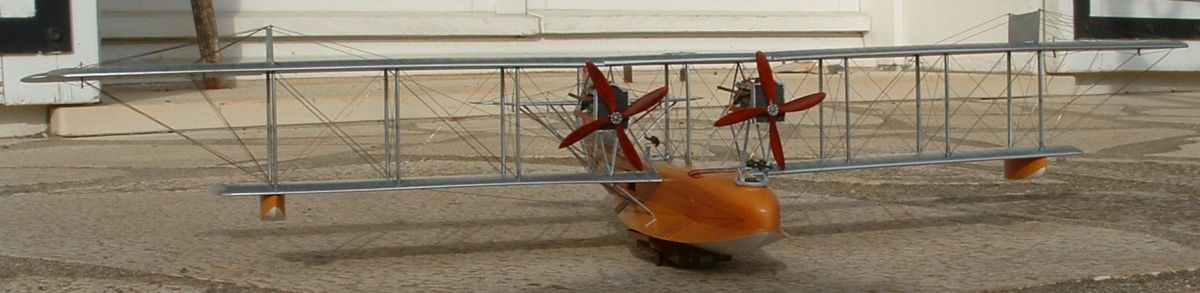
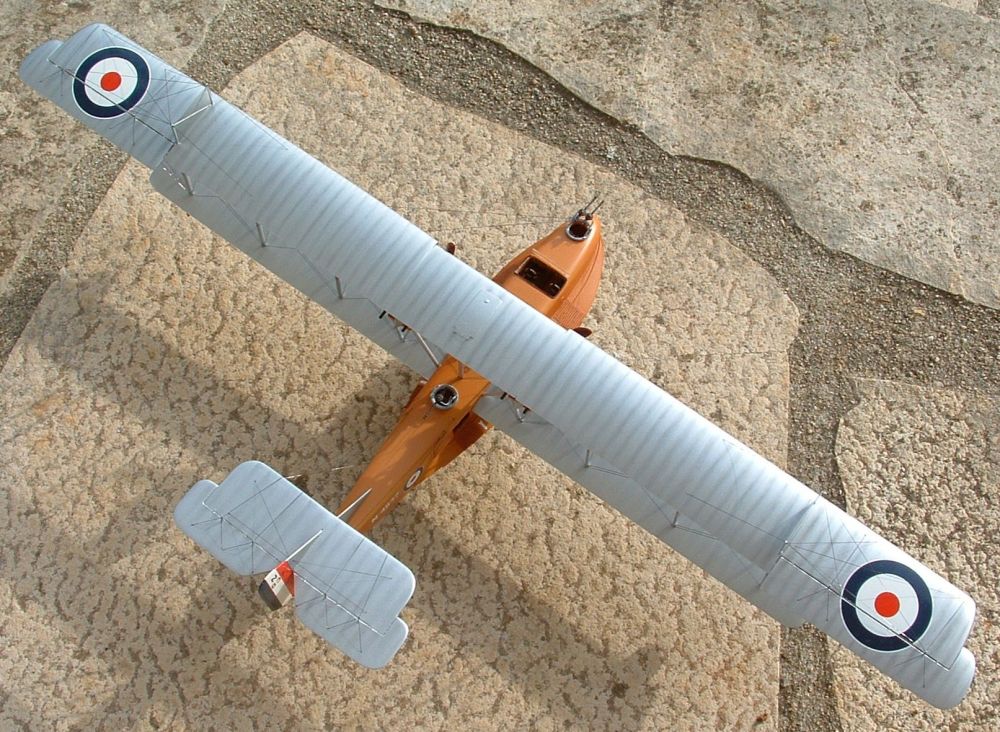
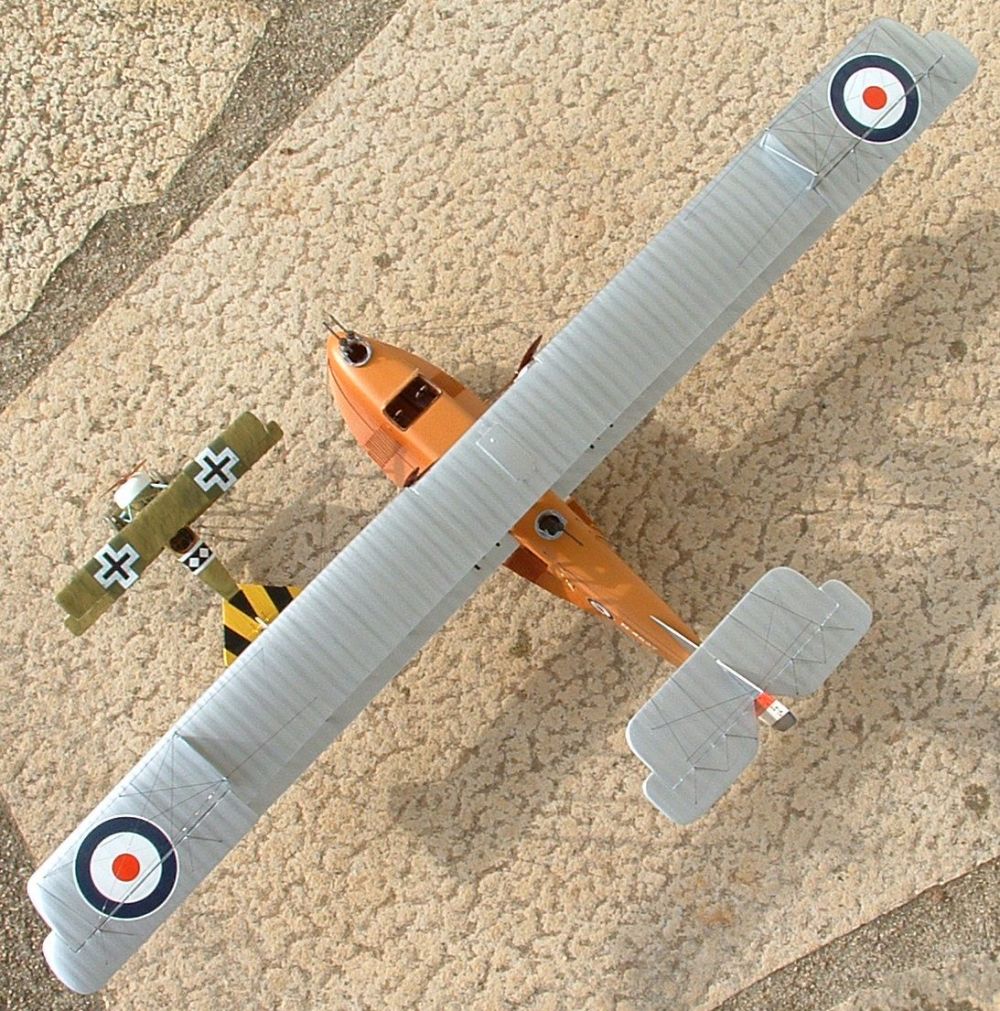
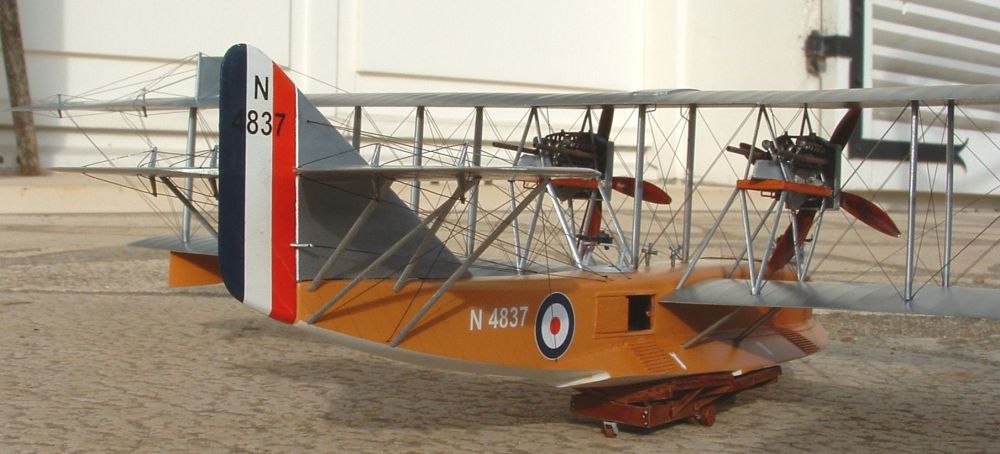
Some pictures of the completed plane :