| Once in a
while along comes a modeler whose work, when you see it for the first
time just takes your breath away and no matter how long one stares at
the pictures, you really don't quite believe what has been done with the
standard kit parts that you are holding in your hand but looking at in
these pictures, and as for the finish,
well you might as well just take up fishing...................
Toichiro Yokoyama (aka
'Toy'), from Sapporo in
Japan, is just such a modeler. When I first saw his work on his web-blog
site he shares with his modeling friends, I was
dumbfounded, it is clearly well beyond the 'norm' both in detail and
quality of finish, yet he was starting with the same model kit that you
or I can purchase in any High Street model shop, but the difference in
workmanship is astounding! Having asked the question "How?",
the answer was most unexpected.
It
turns out that Toichiro is in real life a surgeon, a micro vascular surgery specialist of the highest quality and he
models for relaxation!! All the skills he uses during his working day
are put to great use when modeling, hence the fanatical attention to
building in so much fine detail; to him it's natural, it's what he does
and does so well every day.
He has very kindly sent
me pictures of the construction of his 1/72 scale Matchbox Supermarine
Stranraer. As his English is broken and my Japanese is non-existent, all
the captions are mine alone. Enjoy, or take up fishing.........you
choose.
|
 |
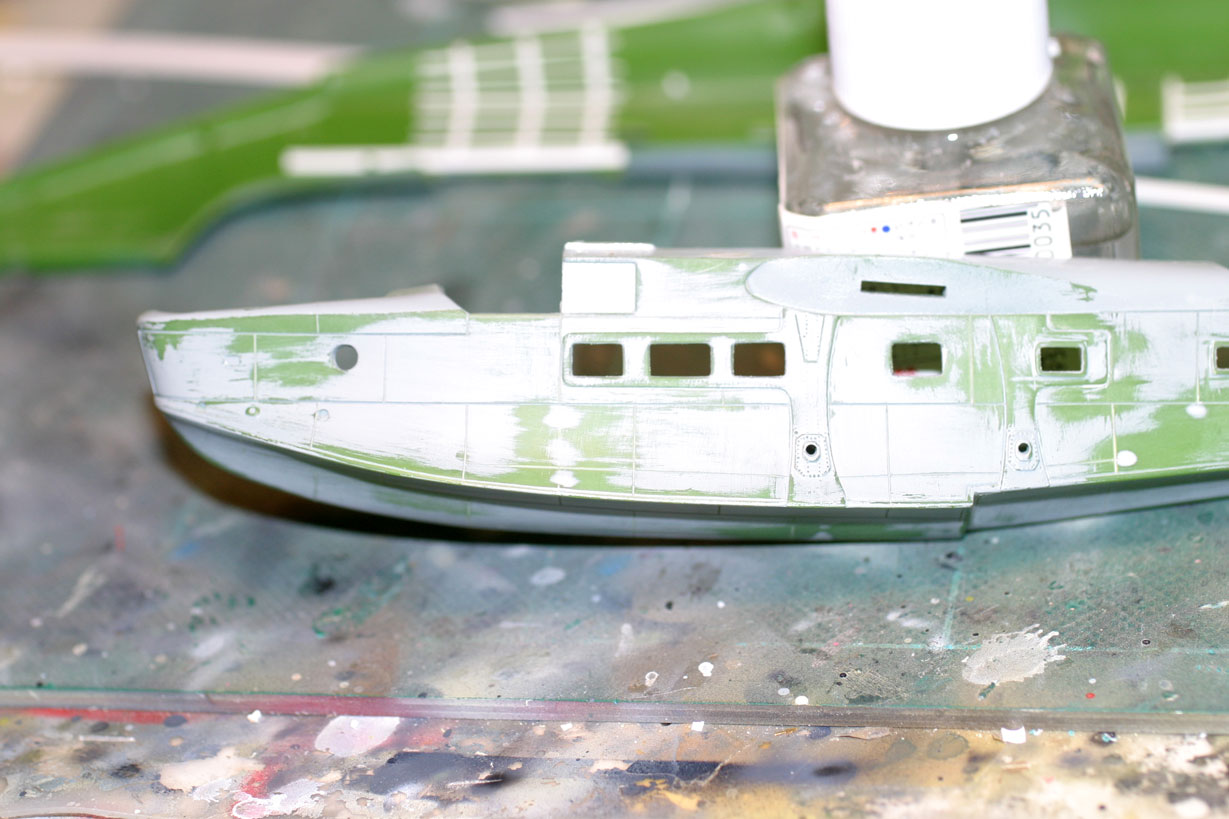
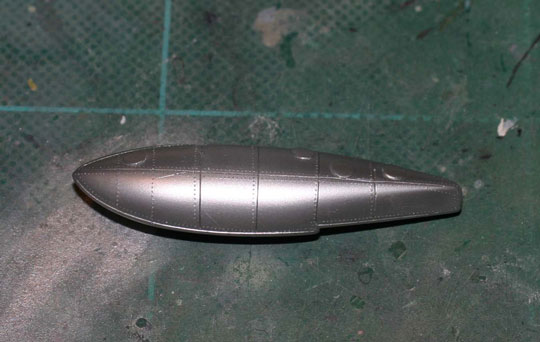
| The
exterior of the hull is continually refined by sanding,
undercoating and sanding again so that it is smooth and the
panel lines filled in. |
|
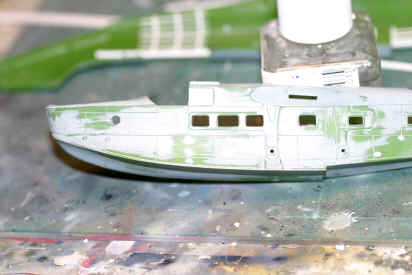 |
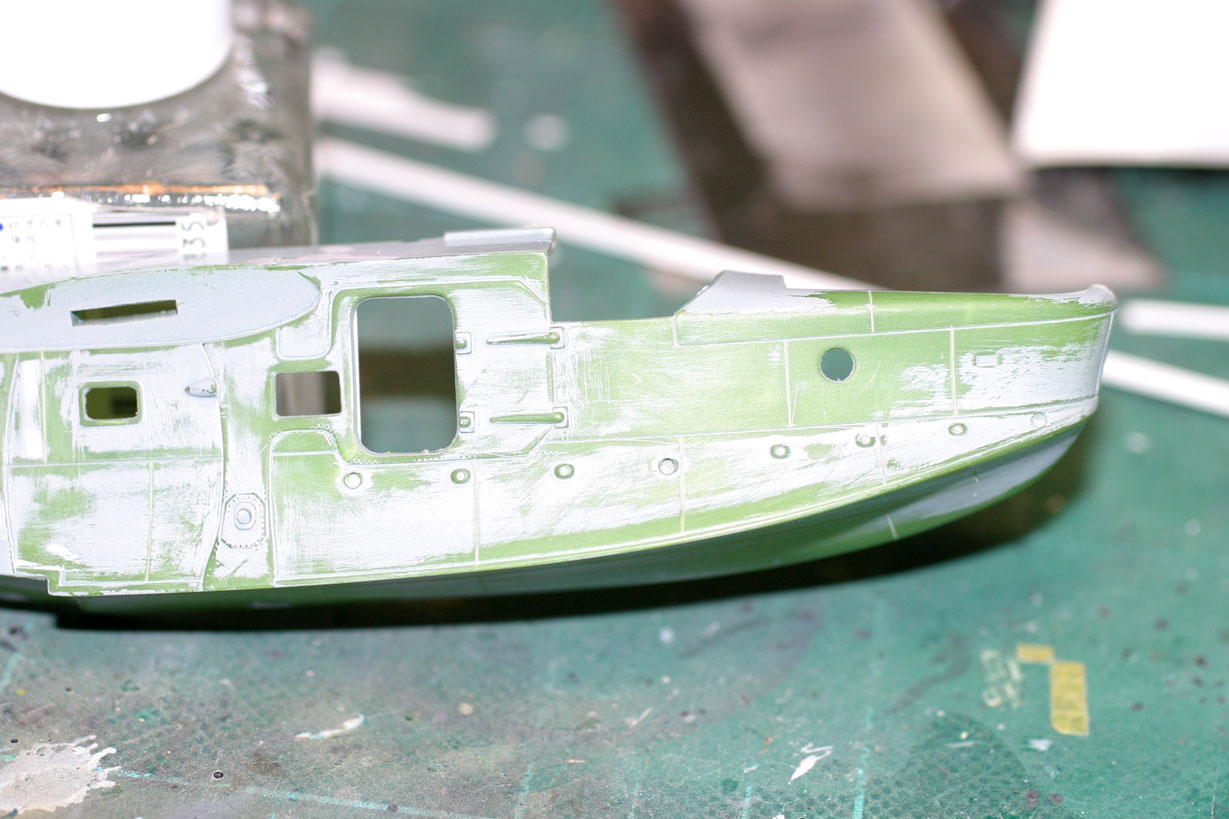
| Exterior
kit holes are filled and the sanding process continues until Toy
is satisfied that all imperfections are gone. Particular
attention is paid to this due to the nature of the silver
finish, which will only serve to highlight them if they are not
eradicated beforehand. |
|
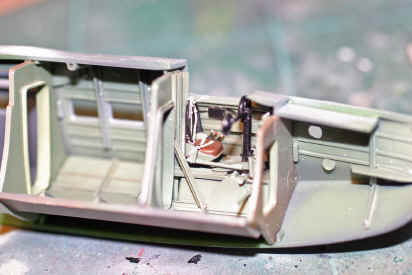  |
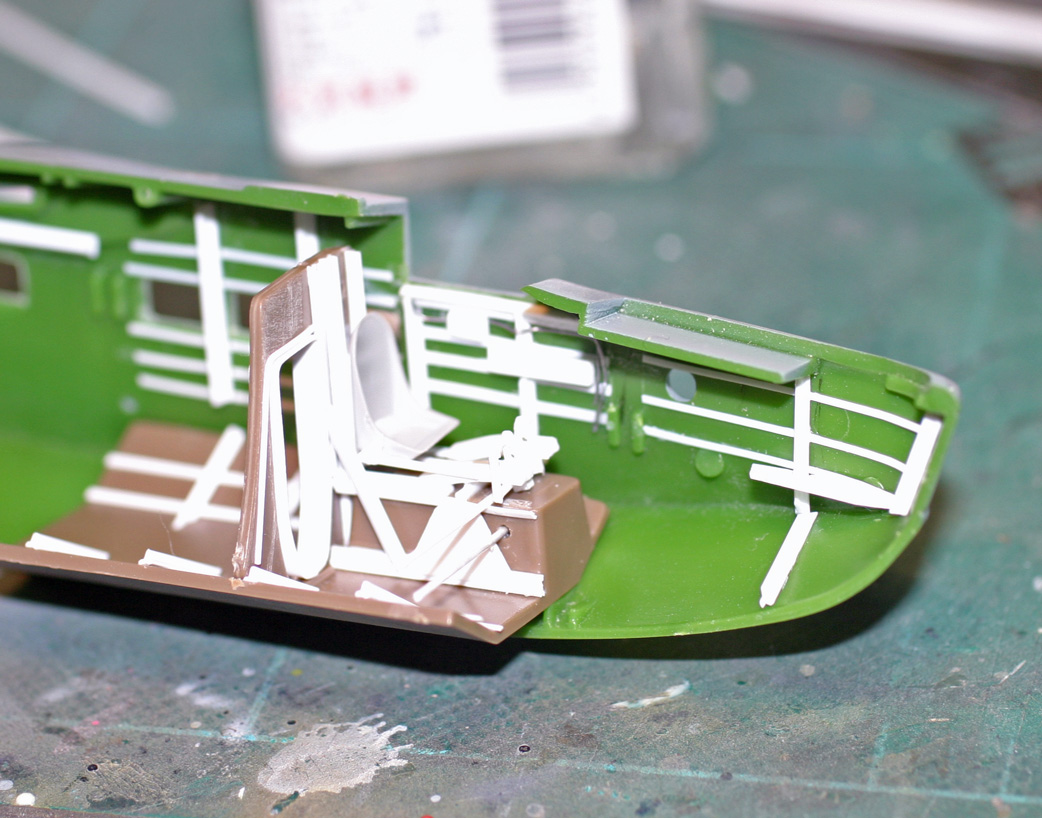
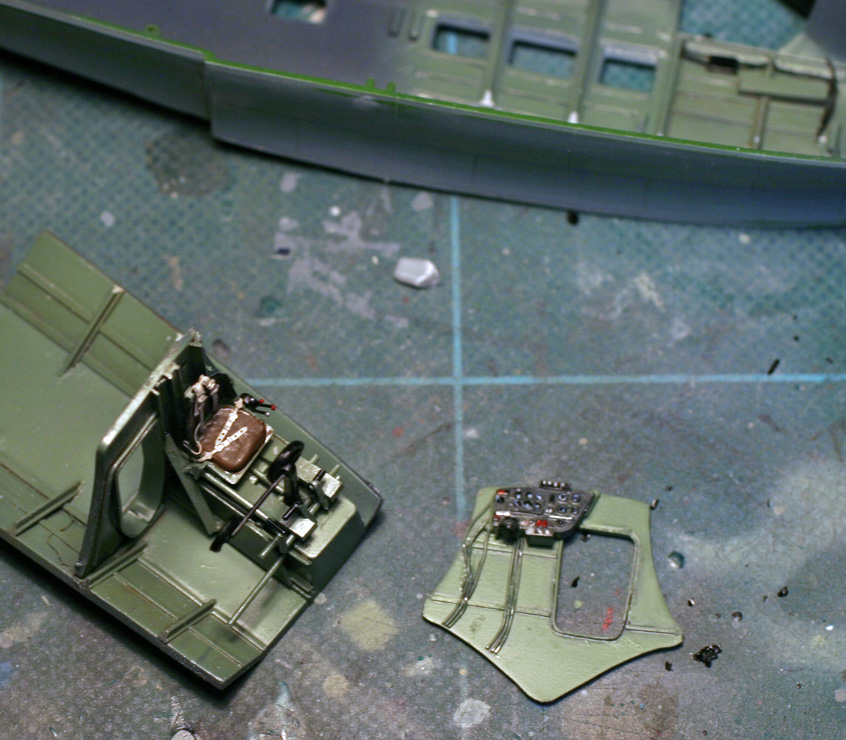
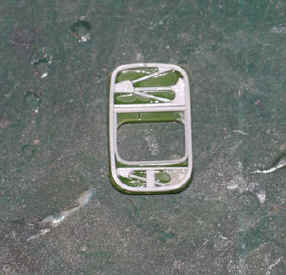
| All
that detail work begins to pay dividends when it is painted.
Note the delicacy of the various levers picked out with red and
white paint and the added seatbelts. A new scratch-built
detailed instrument panel can be seen on the forward bulkhead
part prior to fitting within the hull halves. |
|
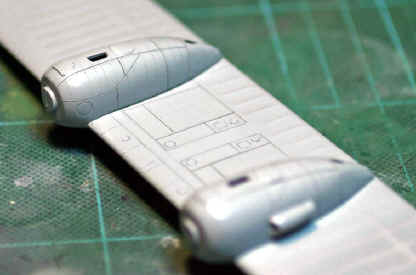 |
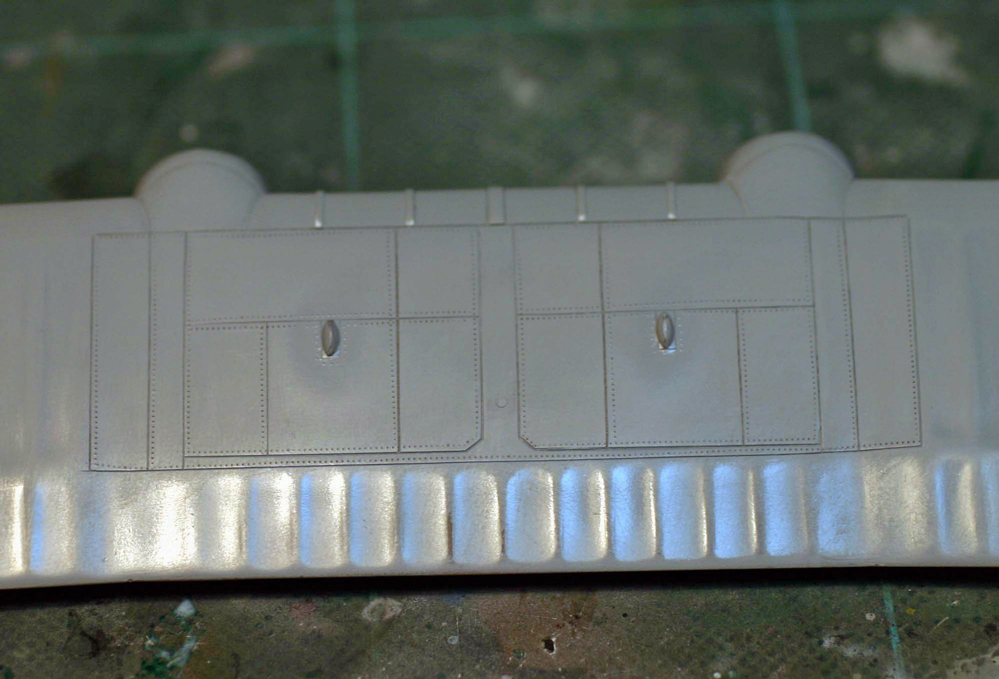
| The
underside of the centre-section of the upper wing is shown here
having received very delicate detailing. Note the added rivet
rows on each engine nacelle and the very smooth undercoated
finish. |
|
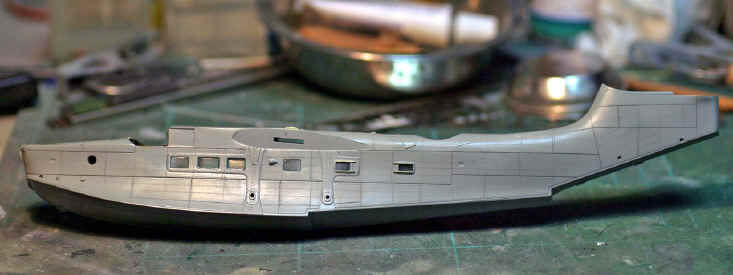 |
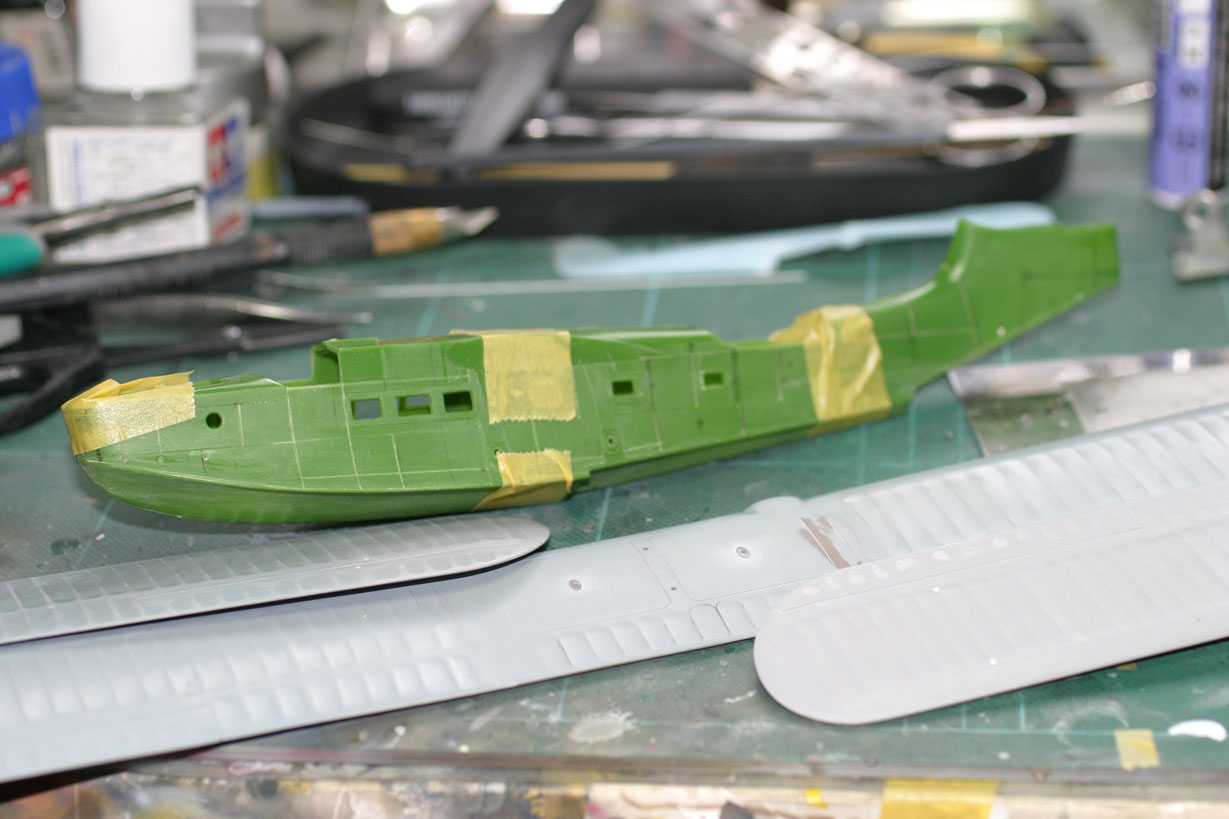
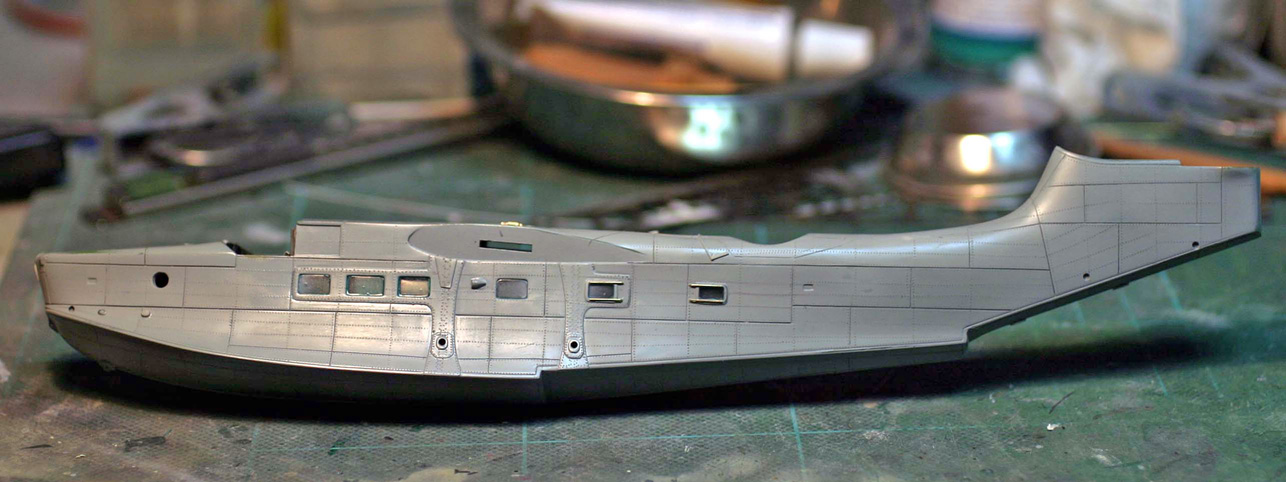
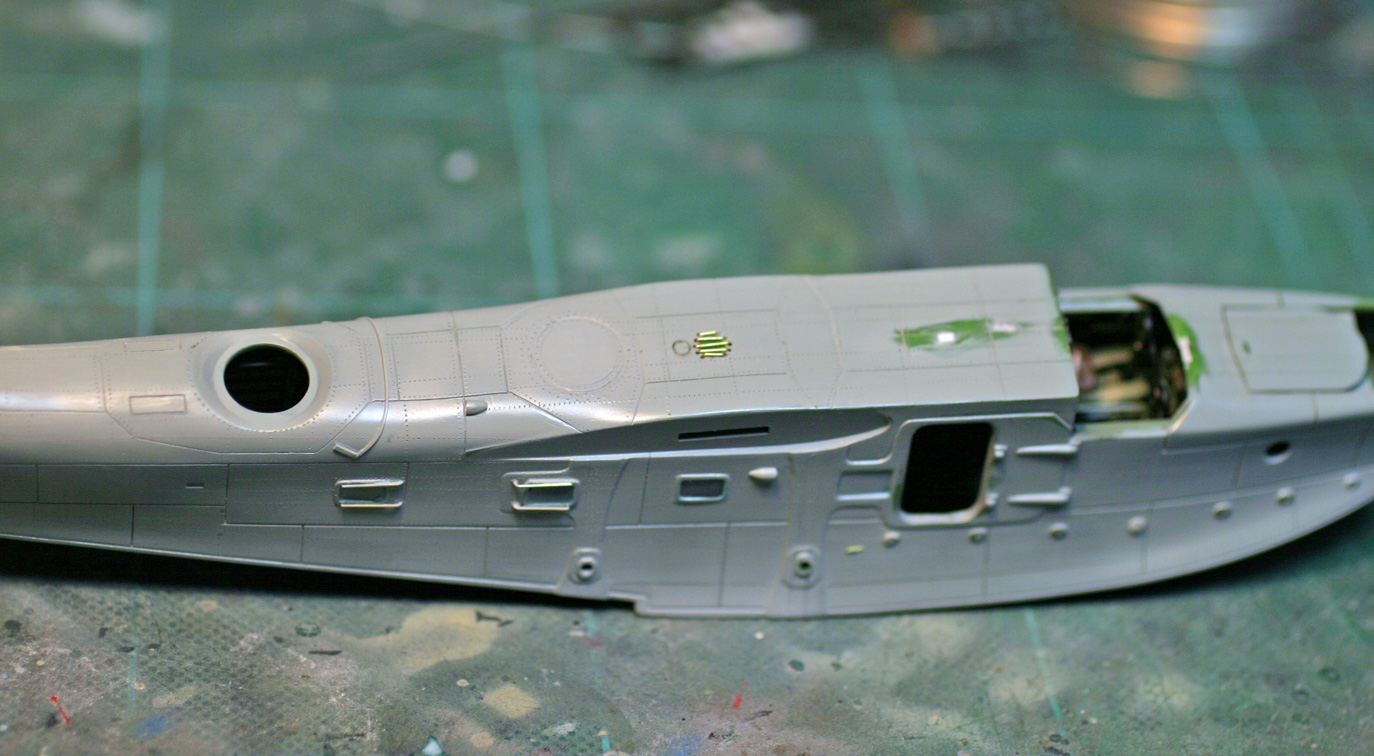
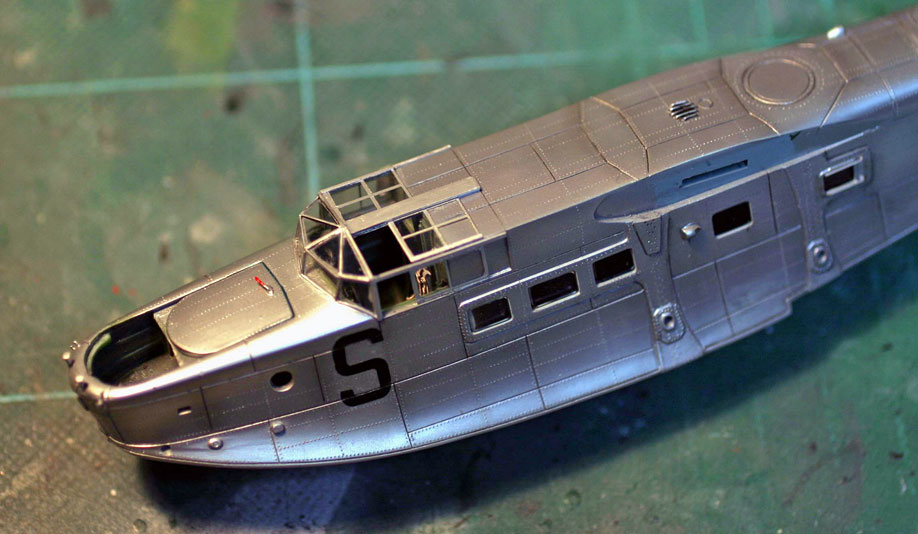
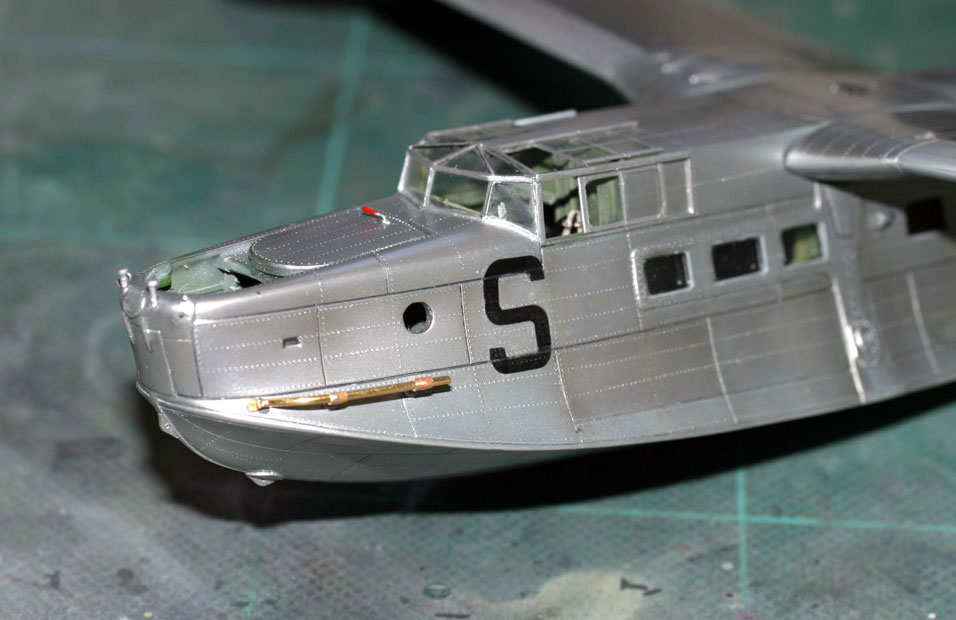
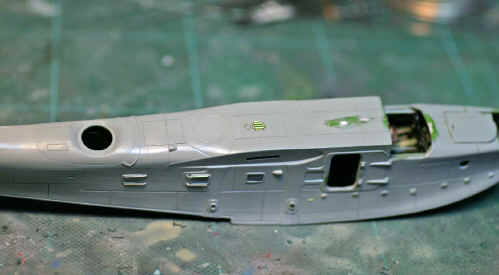
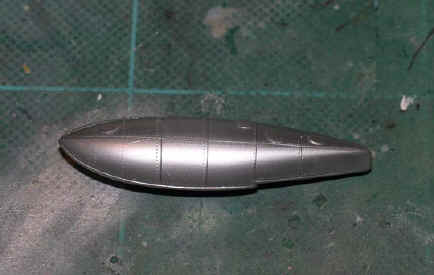
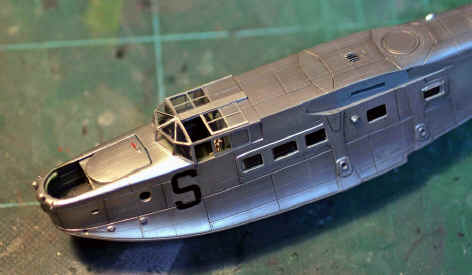
| Here
the hull halves have been joined after the cockpit section has
been fitted and sprayed with a smooth undercoat. Note the rows
of rivet indentations added along the hull. The silver finish
will serve to show all this detail as you will see further down
the page. Note also how 'sharp' and 'crisp' all the various hull
details are; this is a hallmark of Toy's fine workmanship. |
|
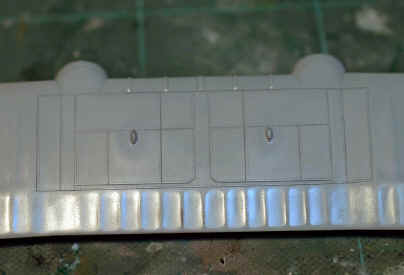 |
| This
is the top of the upper wing centre section. Notice again the
very delicate rows of rivet detail and added blisters. Once
again, the parts have been sanded down and undercoated to a
smooth finish. |
|
 |
| Here
is the upper hull receiving the detail treatment using tiny
scraps of plastic card and fine brass wire. |
|
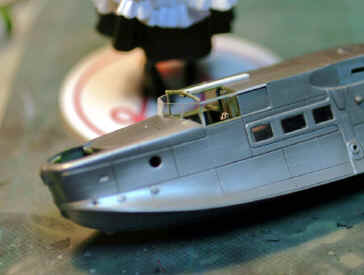  |
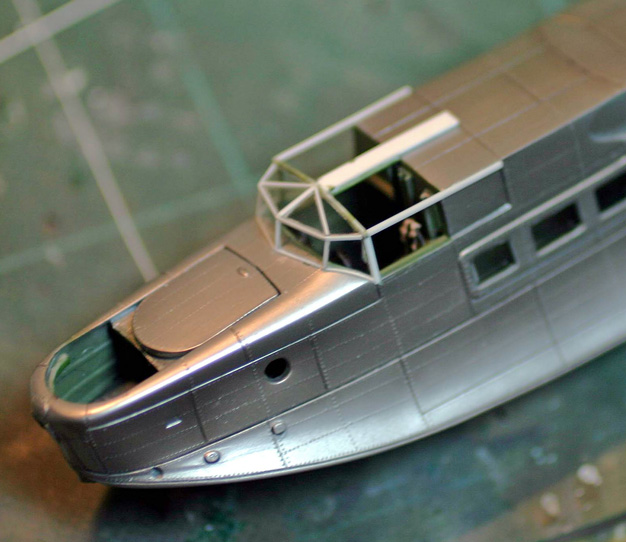
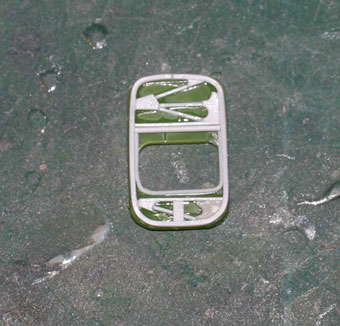
| Not
content with the kit canopy offering, Toy scratch-builds his
own, piece by very tiny piece...!! Go have a look at the kit
part if you really want to appreciate just how tiny each of
these separate window sections really are! Yet, look how neat a
job Toy makes of it all. No wonder he is a micro-surgeon. Note
also at this stage the hull silver finish has already been
applied and the wings are not affixed yet. This is something
that I would not have done at this stage and yet Toy finds a way
of joining the other kits parts flawlessly later. |
|
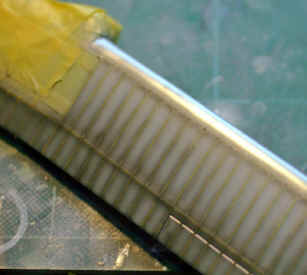  |
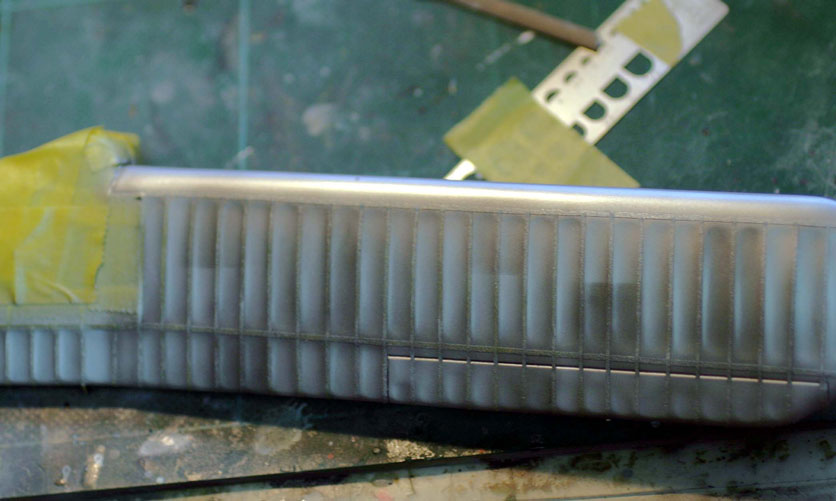
| The
wings are being detailed here with the addition of rib tapes
each being 'post-shaded' to add visual contrast. |
|
  |
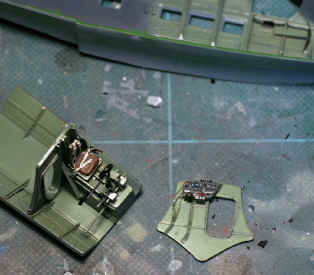
| Whilst
the main construction continues other items receive attention.
Here, on the left the hull forward starboard door interior has
been detailed with slivers of plastic card and sprue whilst on
the right one of the engines has been replaced by a spare part,
detailed and painted prior to fitting; looking at the now
redundant kit part you can see why. |
|
 |
| This
is one of the floats finished, prior to final fitting. It has
been sanded smooth, panel lines re-cut and rivet detail added
just like the main airframe, then sprayed silver. Notice also
the added caps on top. |
|
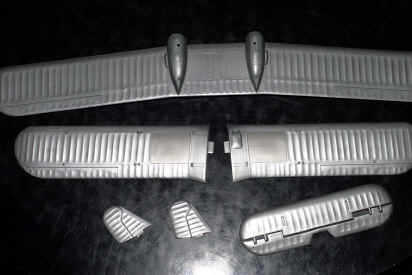 |
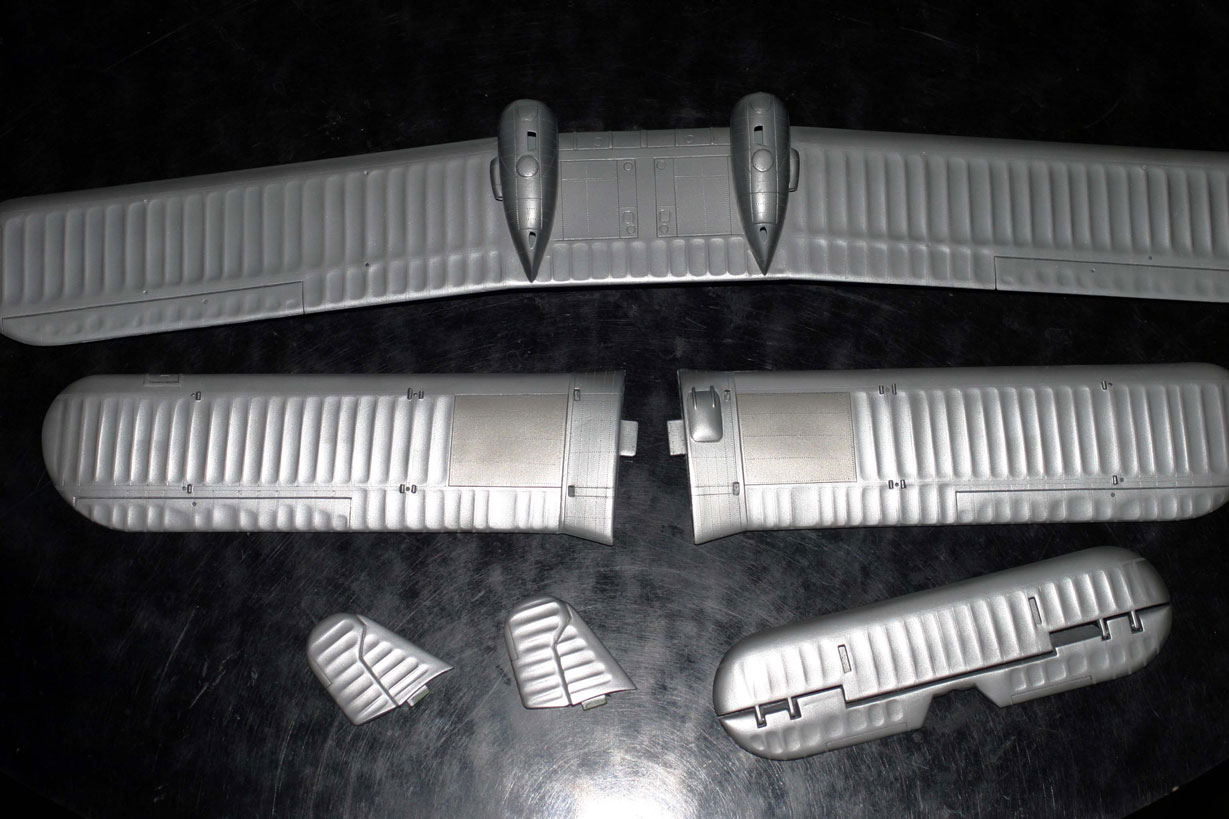
| Here
is an overall shot of all the wing and tailplane elements, all
finished and ready for final fitting. Notice the various
different shades in the overall colour scheme. |
|
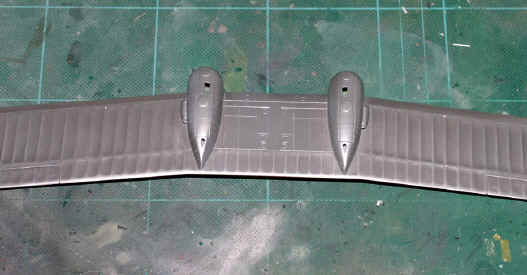 |
| An
overall view of the underside of the upper wing. If you look
closely you can see the ribs showing as a slightly different
colour as a result of the masking shown earlier. |
|
 |
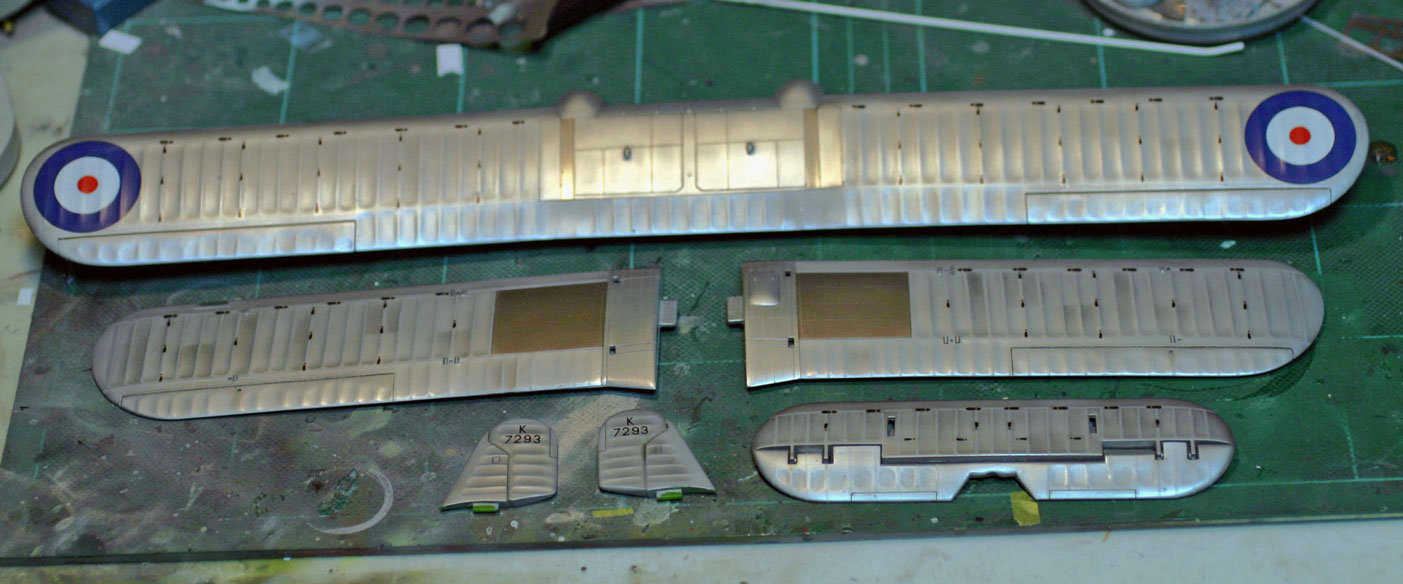
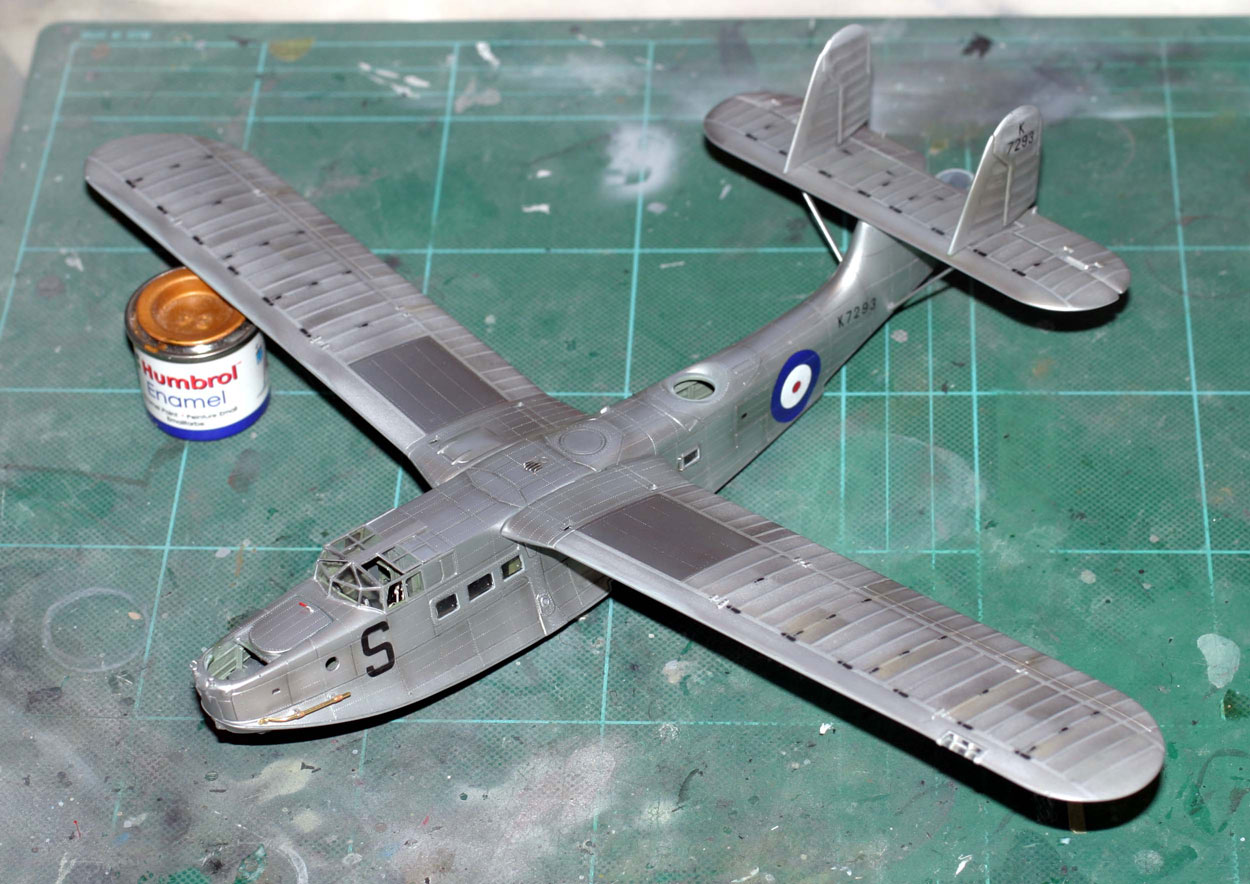
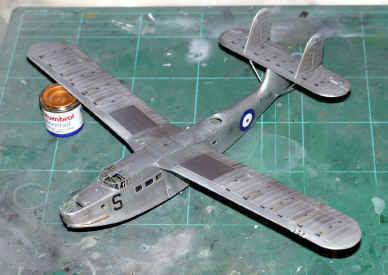
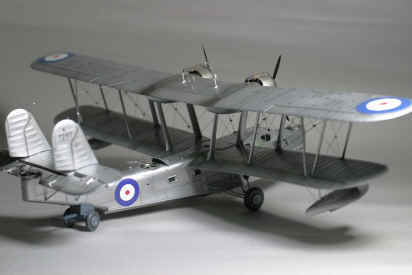
| In
this overall view of the upper surfaces of the main wings and
tailplane you can see the very subtle effect of the multiple
shades of silver finish which looks quite realistic,
particularly the difference between the doped fabric effect of
the wings and the metal covering the wing fuel tanks. Notice
also that the decals have already been applied and that, to all
intents, the parts are fully finished. |
|
 |
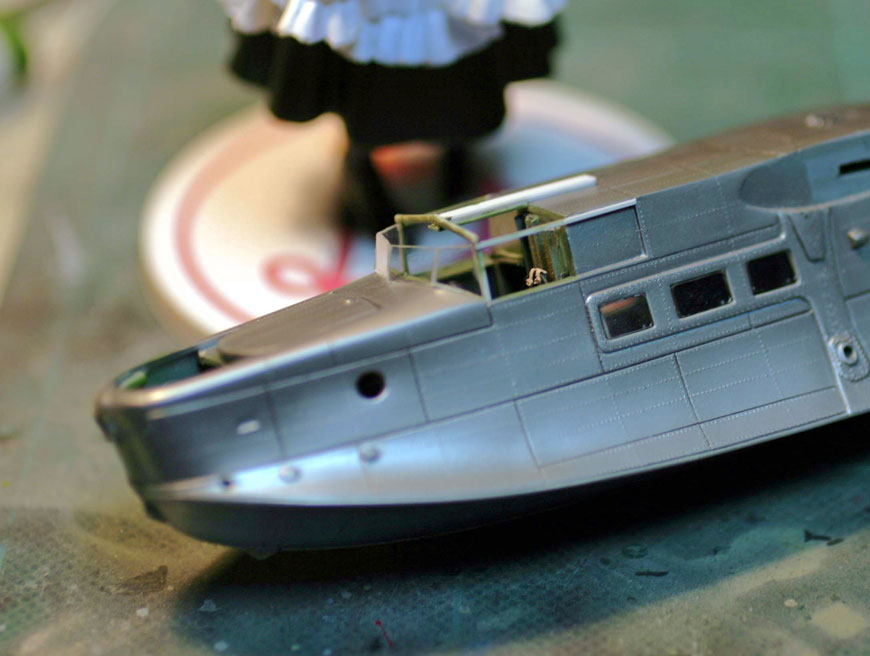
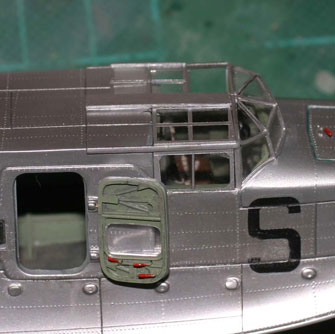
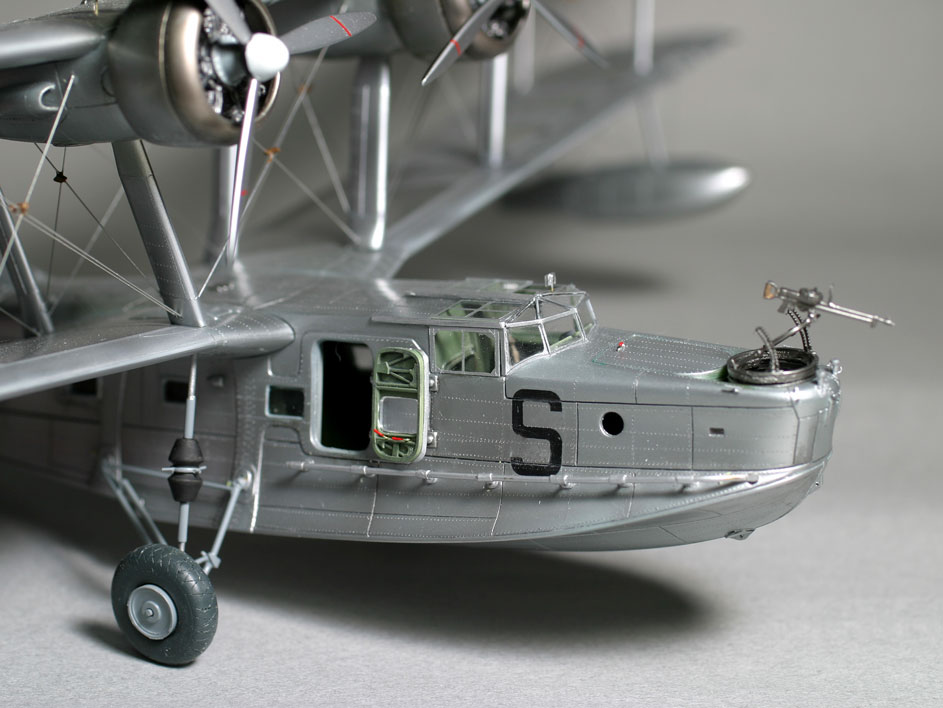
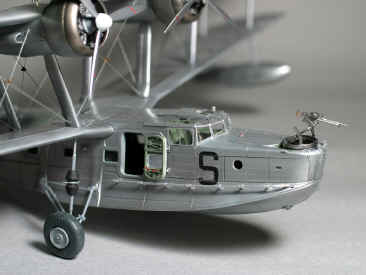
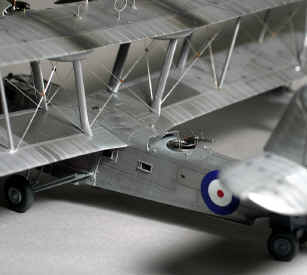
| Forward
hull showing the completed cockpit glazing. Again, the hull
appears fully finished and decaled. The fine shading of the
silver paintwork draws attention to the rivet detail. |
|
  |
| A
close-up of the scratch-built fully finished starboard door
showing the fine detail now painted. On the right are the brass
wire components for the forward hull rails. |
|
 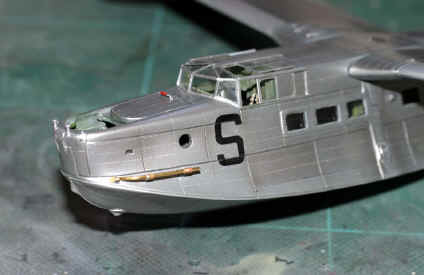 |
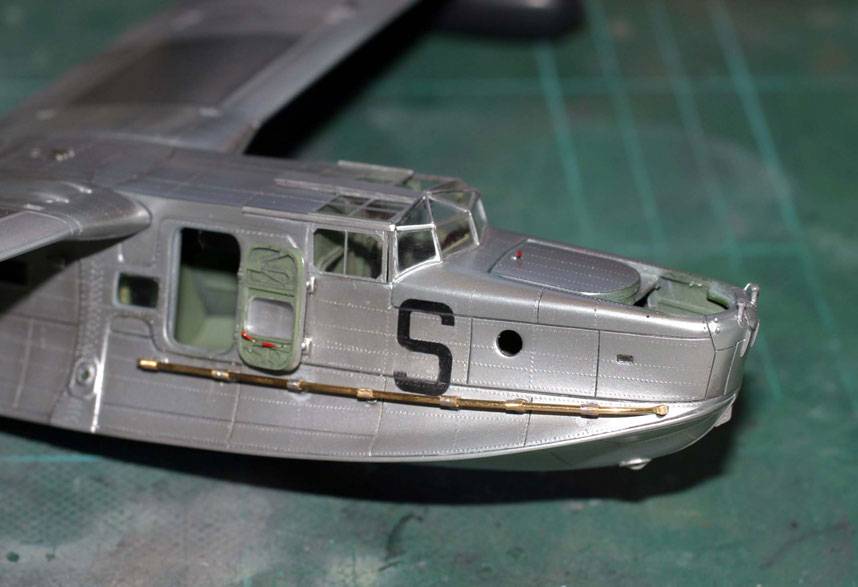
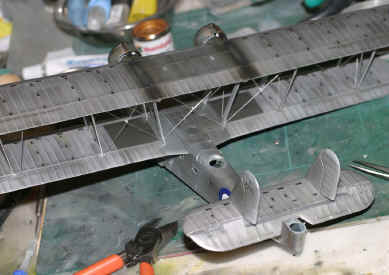
| Left
and right views of the now fitted rails ready to be painted.
Yes, that is correct to have the starboard one longer than the
port rail. Notice also again, the subtle effects of multiple
shades of silver and the neat rivet detail. The lower wings have
been fitted in this view, very neatly and with no apparent
gaps. |
|
 |
| Final
assembly is well under way with the lower wings and now the tail
empennage joined to the hull. |
|
  |
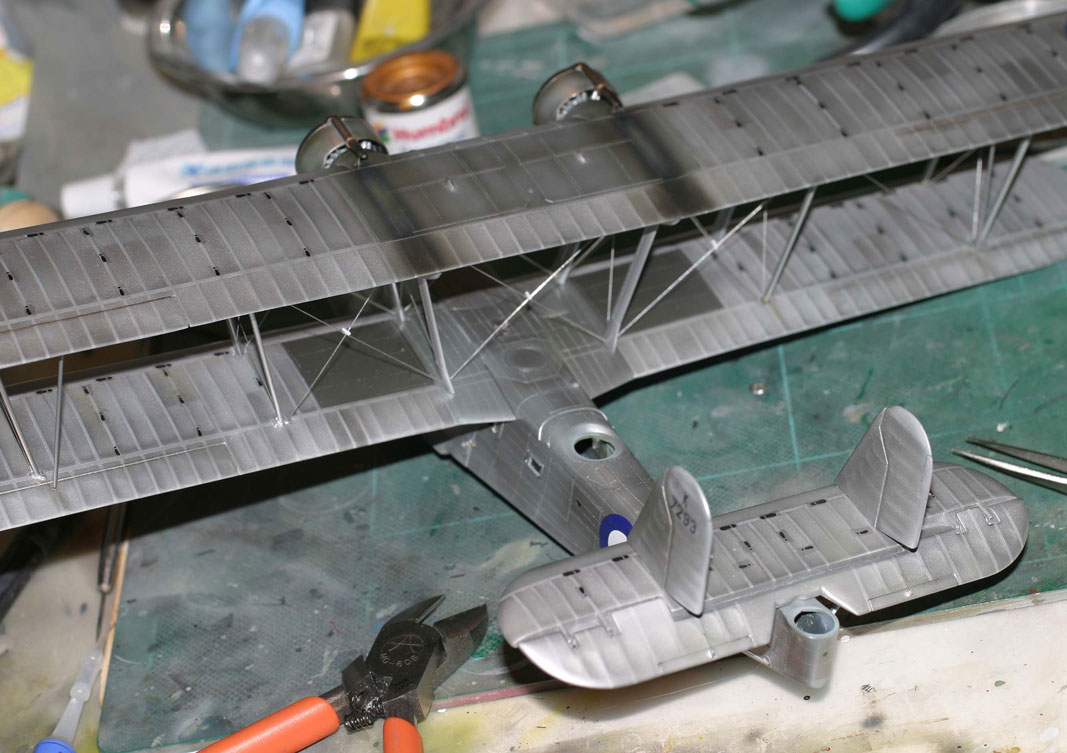
| The
left hand image is a slightly different view than the one above,
showing more of the decal walkways on the lower wings, together
with the darker coloured fuel tank areas. Note the walkways on
the tail empennage also. On the right, we can see that the
inter-plane rigging has been done following placement of the
upper wing. That all the airframe is painted and fully finished
whilst these operations are carried out is quite amazing (to
me). It would be so easy to spoil the finish with glue spots and
runs. |
|
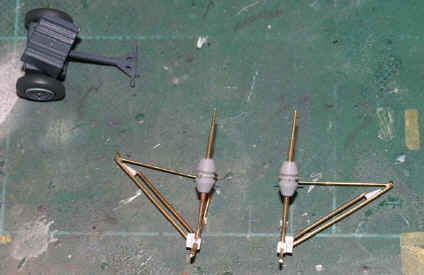 |
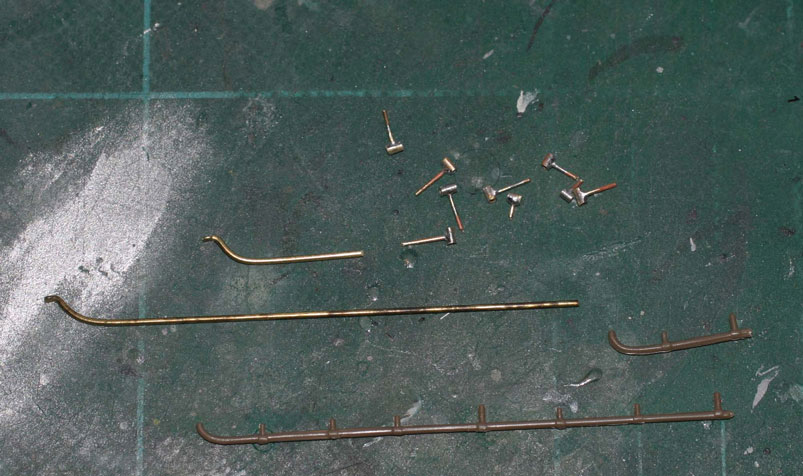
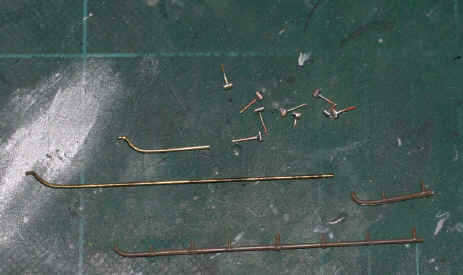
| Scratch-built
beaching gear sub-assemblies with brass wire oleo legs together
with odd bits of the kit parts, await painting. |
|
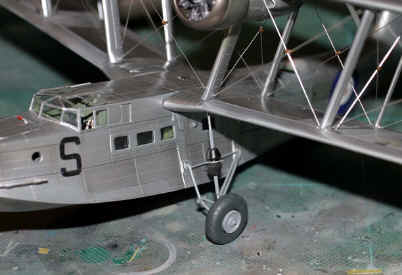  |
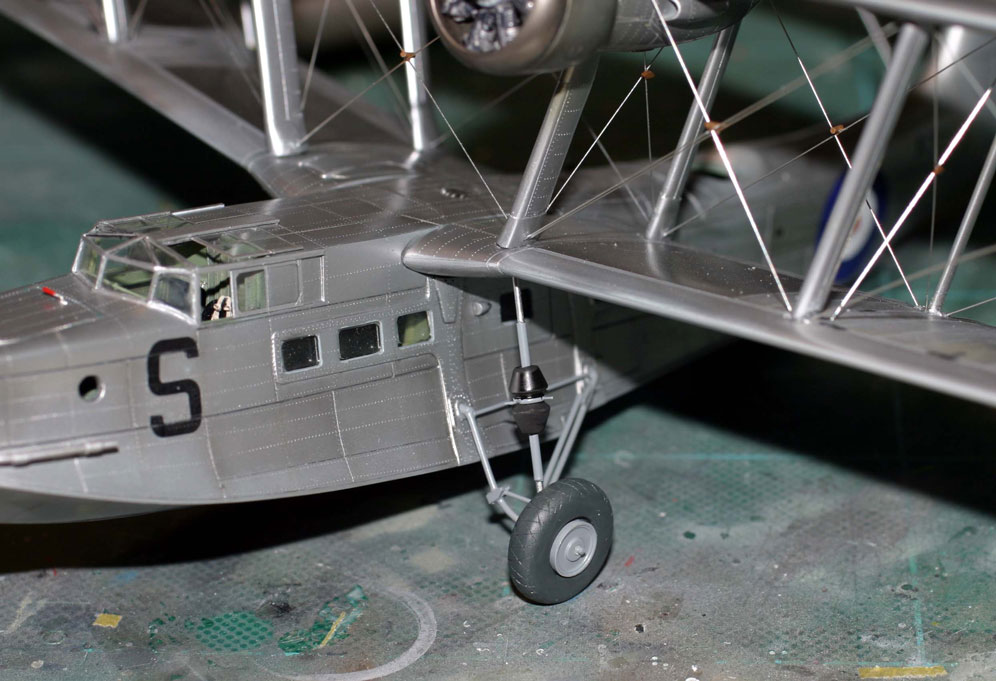
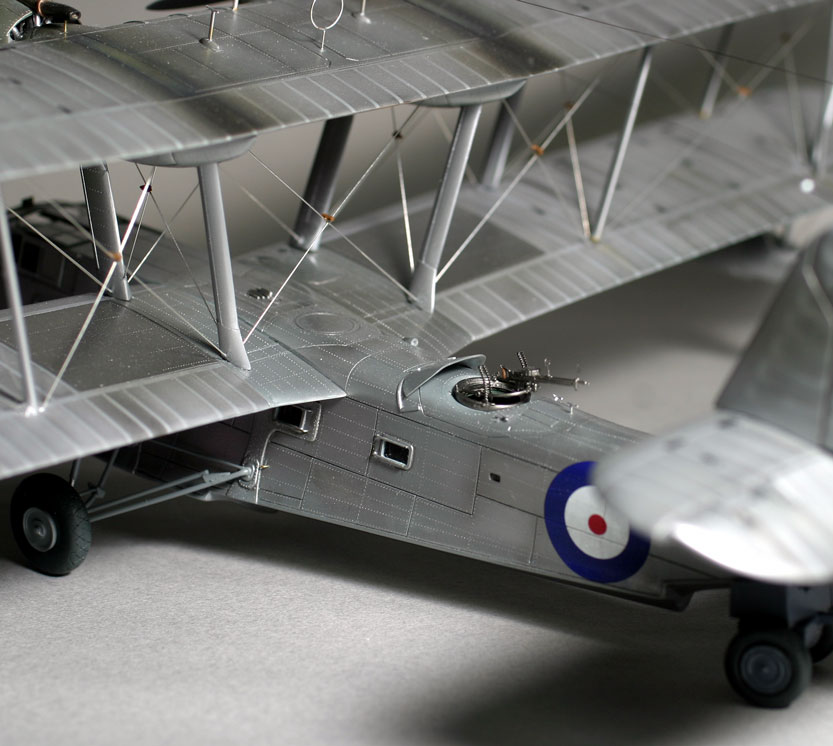
| Close-up
of the fully fitted and finished beaching gear with wheel and
tyre. Note how delicate this looks. This shot also affords a
close view of the wing rigging attachment points which are
wither drilled and located into the base of the strut or the
wing itself.
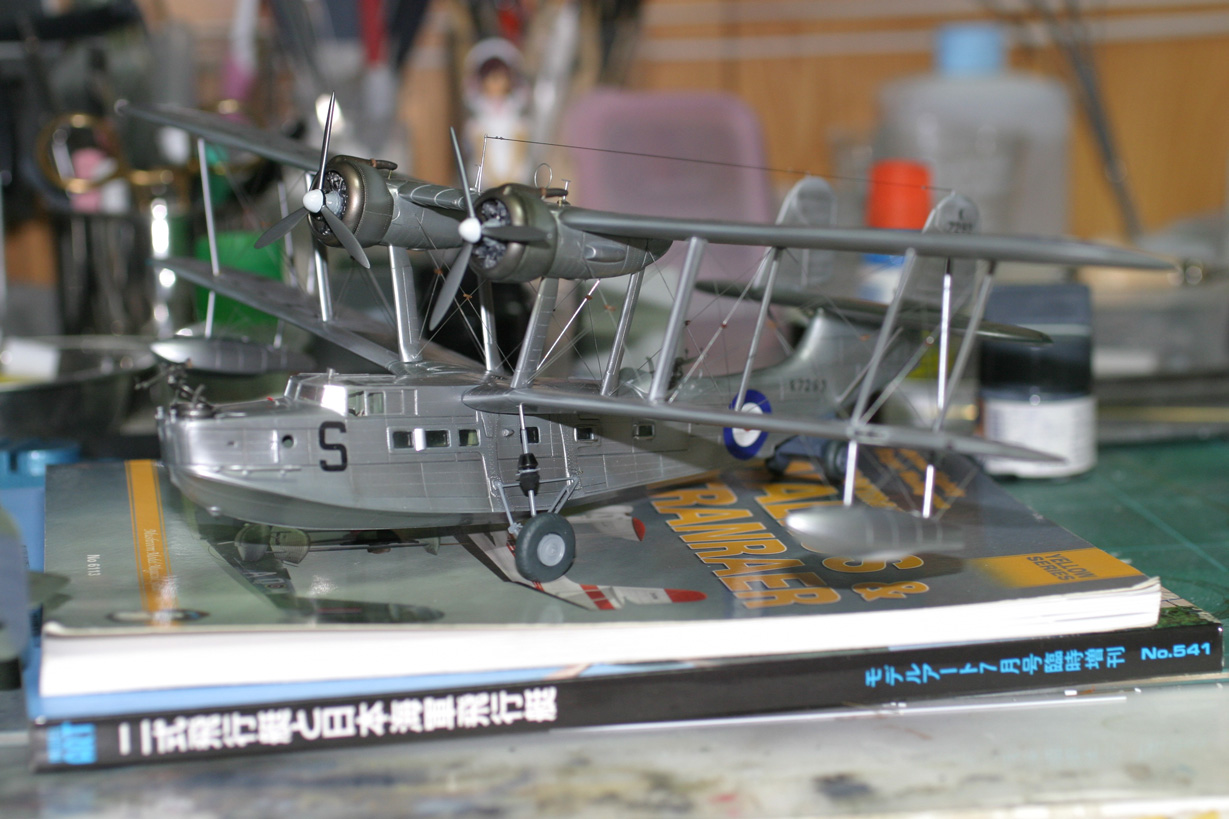
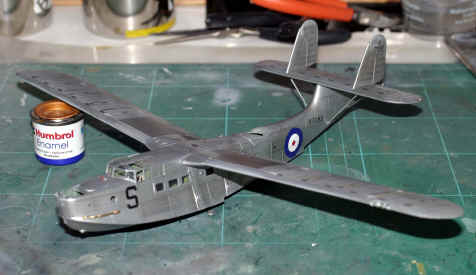
The
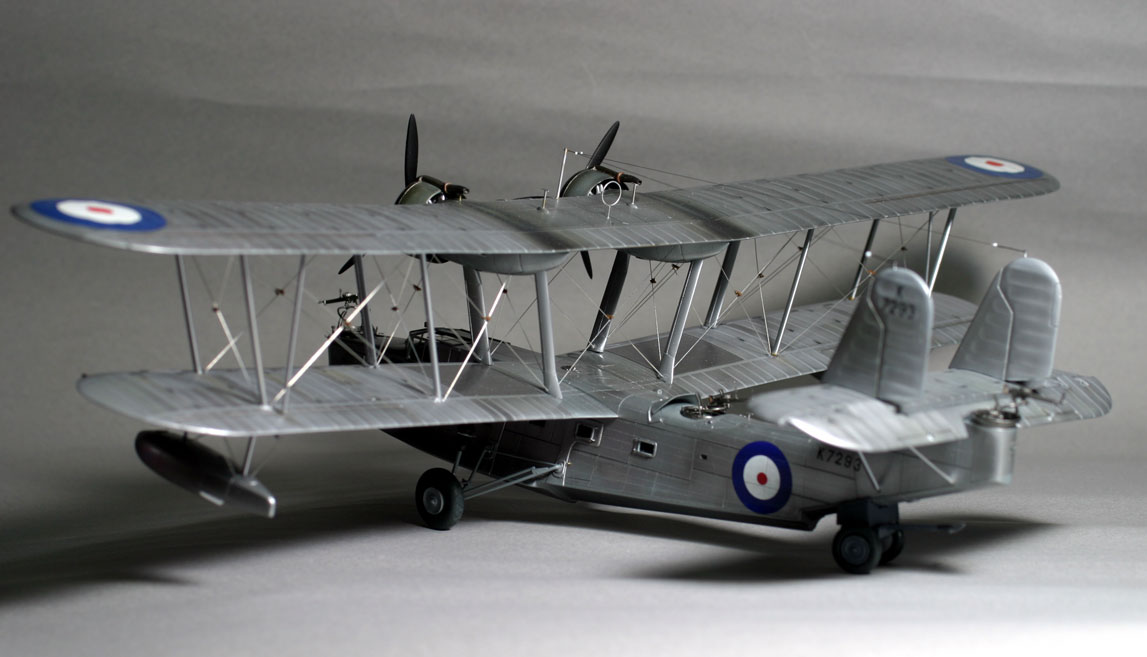
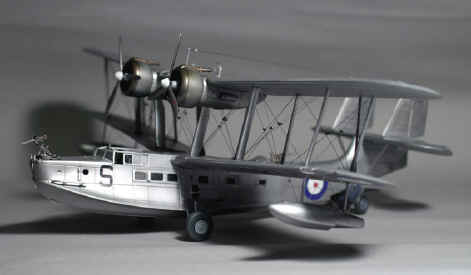
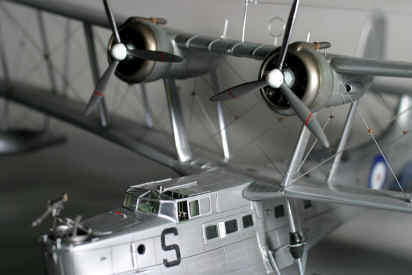
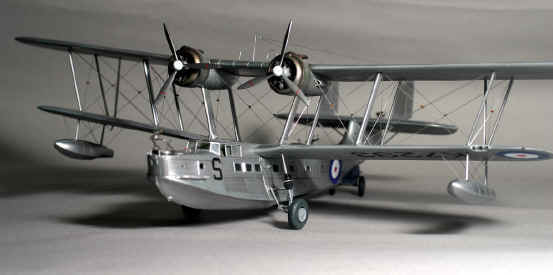
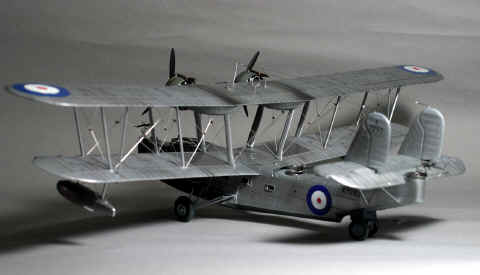
Finished Model - Just Superb! |
|
  |
  |
  |
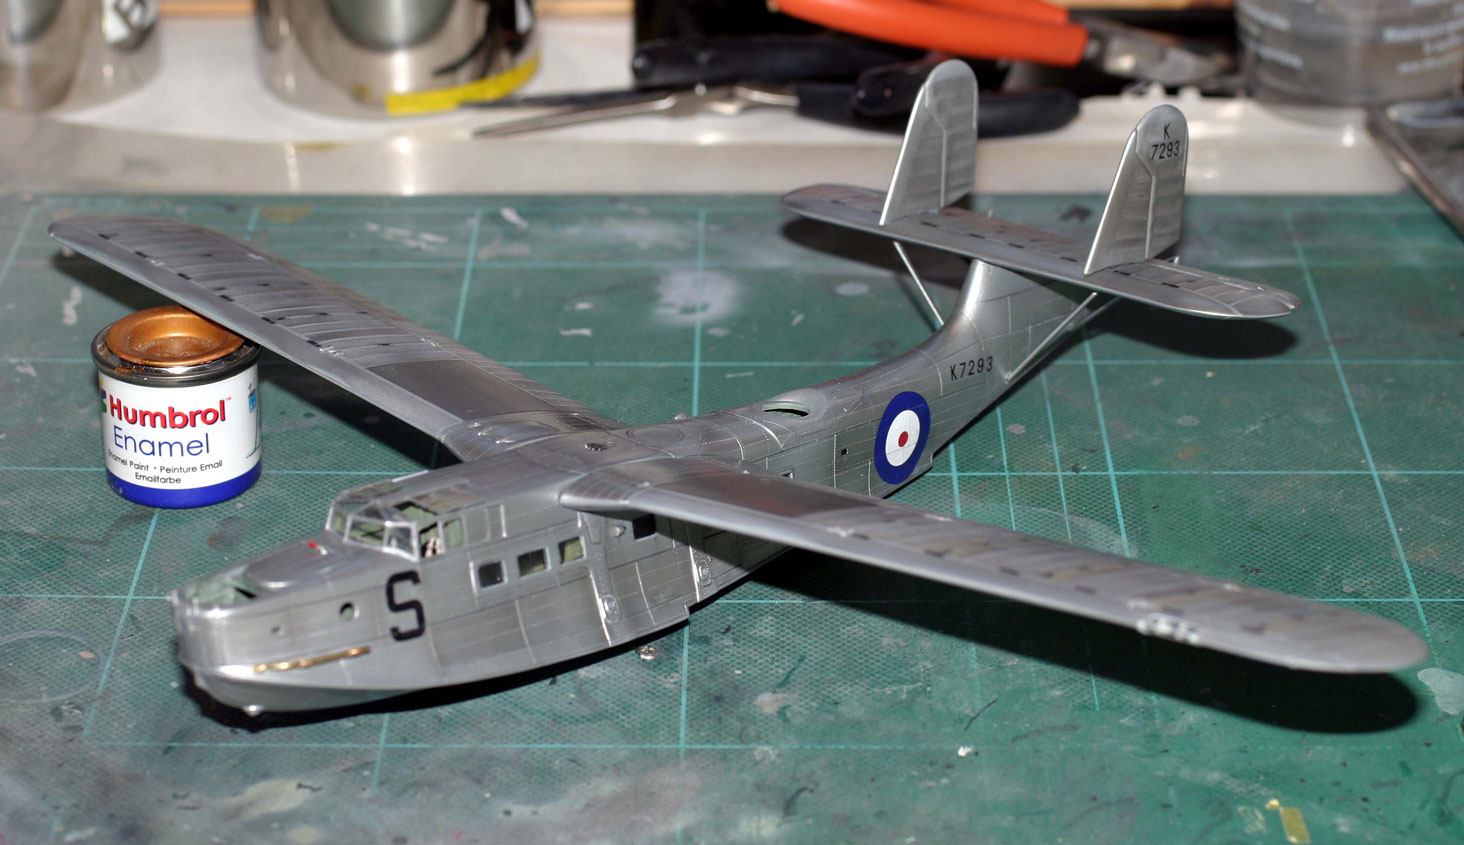
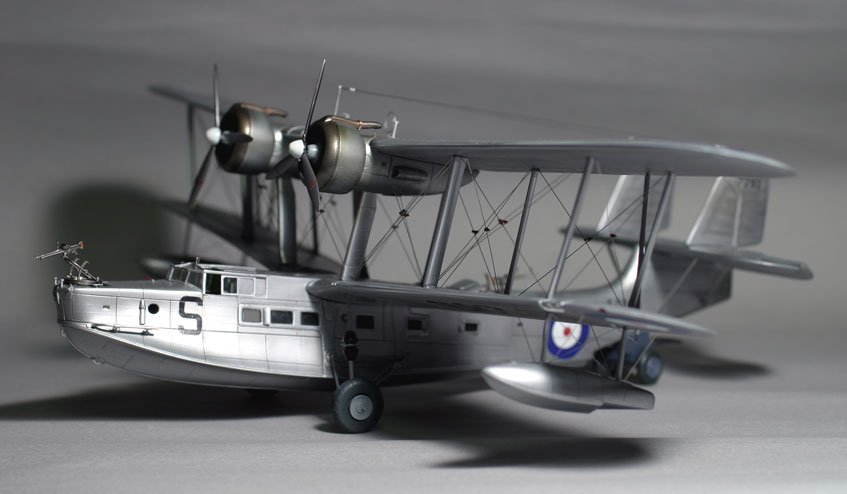
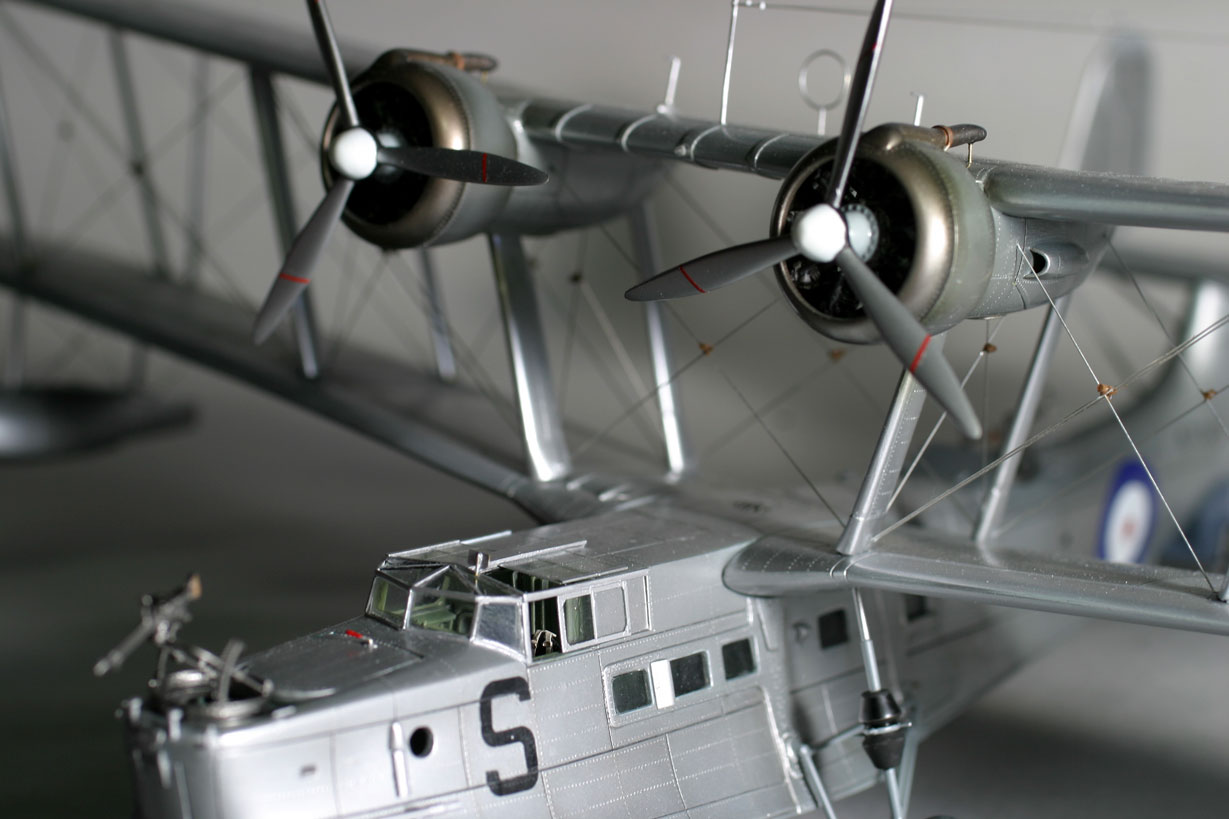
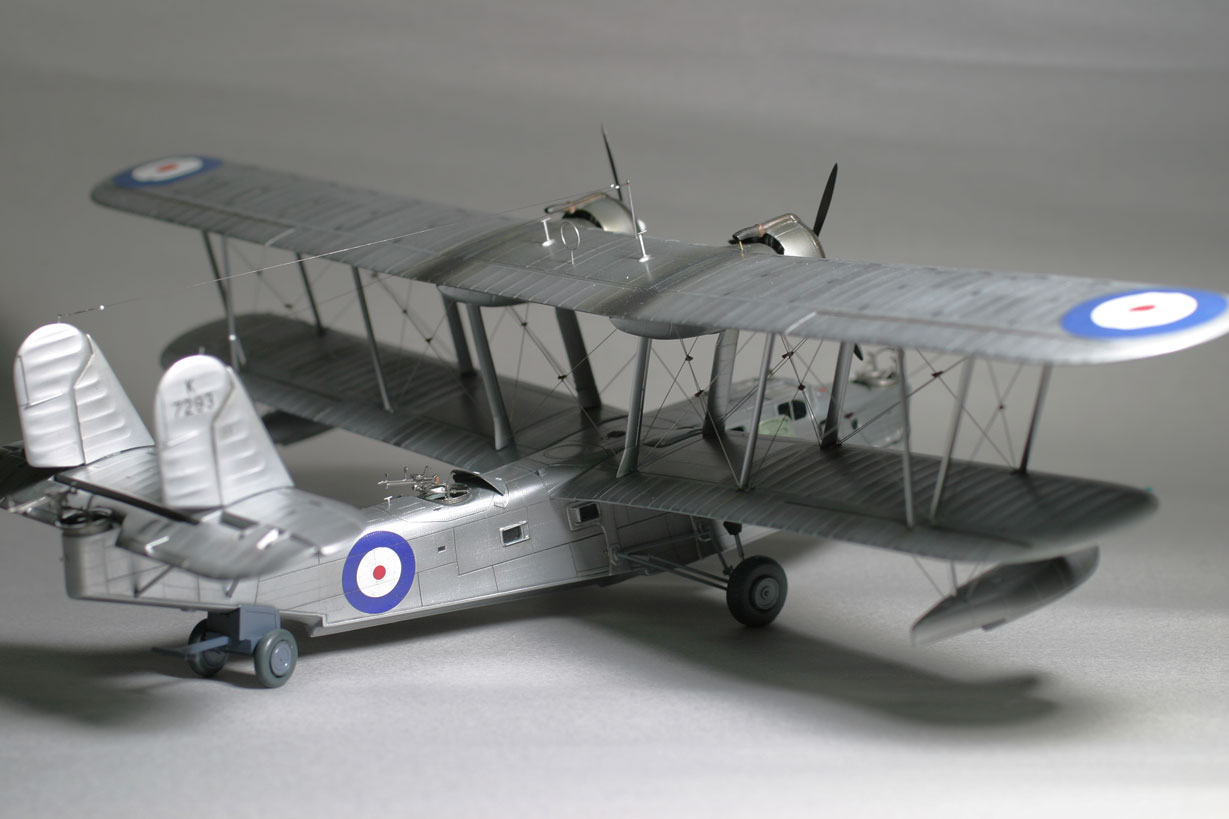
| And there it
is; the finished model in all it's glory. Quite one of the most
attractive builds of the Stranraer I have ever seen. It just shows what
can be done with the old Matchbox kit given time, patience, good
references and the masterly skills of a micro-surgeon! Just look at the
detail work in the guns, aerials, propellers and exhausts.
Stunning, simply stunning...!!
Toichiro Yokoyama is
indeed a master modeler and SEAWINGS is indebted to him for permission
to reproduce his work here. Other equally stunning examples of his work
can be seen in the Model Gallery elsewhere on this site. Don't
forget to pay regular visits to his web-blog
site where other equally stunning examples of his, and his modeling
friends, can be readily seen; don't worry about the language barrier -
after you have seen this work you will be speechless anyway!!!! |